Last Updated on November 8, 2022
GE freezers are great appliances, but they can also be a real pain to clean. The drain tube gets clogged easily and requires some elbow grease to get out. How do you deal with these issues?
If you have ever had a problem with your freezer or refrigerator, then you know how important it is to fix them promptly. This guide shows you how to clean your freezer drain without having to call a plumber.
This article provides step-by-step instructions on cleaning your freezer drain. It explains how to remove ice from the drain and prevent future blockages.

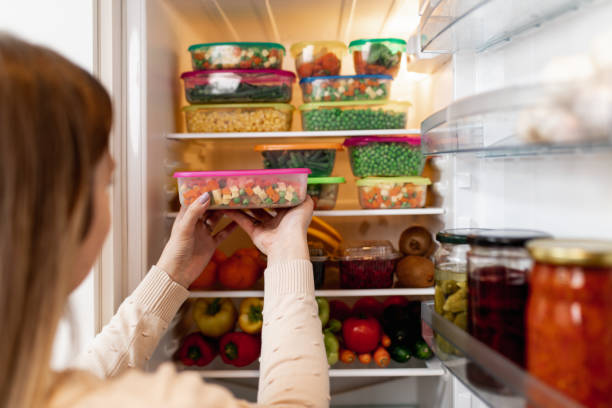
The refrigerator is one of those things you just don’t think about cleaning very often. But it needs frequent attention to keep working well. One thing we always do is check our refrigerator drain every couple months. If there are clogs, it could mean food particles getting stuck in the drain. This might cause odors to come out of the drain. And if the drain gets blocked, water could start backing up into the refrigerator.
GE recommends checking your refrigerator drain once a month. They say to look for signs of leaks around the drain hole cover. There should be no leaking liquid coming out of the drain hole itself. Also, make sure the seal around the drain hole isn’t cracked or broken.
If the seal looks like it’s been damaged, replace it. To fix the drain hole, use a small screwdriver to pry off the plastic cover. Then, take a toothpick and poke holes in the rubber gasket under the drain hole cover. Put some dish soap in the sink and run hot water over it.

Let the water flow down the drain and see how much soap goes down the drain. If the amount is minimal, put some baking soda in a bowl and add enough warm water to dissolve it completely. Run the water down the drain again. Repeat this process until the amount of soap running down the drain is equal to the amount of baking soda. Once the mixture is clear, pour it into the drain.
Unclogging a GE Freezer Drain – Quick Fix
Here are some tips you might want to consider.
- 1. If you see water leaking from the bottom of the refrigerator, turn the power off to the unit. Then, shut the door. Wait 15 minutes and check again. If the water still pours out, contact a professional appliance repairman.
- 2. Remove the ice maker tray and take out the filter. You can use a screwdriver to loosen the screws underneath the ice maker tray. Once the screws are loose, lift up the tray and pull it away from the refrigerator. Take out the filter and clean it thoroughly. Replace the ice maker tray and tighten the screws.
- 3. Next, look inside the freezer compartment. There should be a rubber gasket located near the front of the freezer compartment. Remove the gasket and wipe it off with a damp cloth. Reinstall the gasket and replace the lid.
- 4. Finally, check under the refrigerator. Look for a small pipe that runs along the baseboard. This is where the water goes when it spills out of the refrigerator. Unplug the refrigerator and remove the cover plate. Check the area surrounding the pipe. Use a flashlight to inspect the area. Is there debris or food buildup blocking the pipe? Cleaning the pipe will help prevent future issues.
- 5. Now that you know how to unclog the refrigerator drain, you might want to follow these steps to unclog the freezer drain.
- 6. First, unplug the freezer. Turn the compressor switch to OFF position. Open the freezer door. Pull the freezer liner forward and remove it. Be careful to not touch the electrical components.
1: Locate the Drain
Before you clean the drain, find out where it is located. This will help you decide what tools are needed. If there is no visible drain pipe, look for a trap under the sink. A trap is usually found near the bottom of the sink cabinet. You might also see a rubber hose attached to the faucet. Look inside the trap for a small metal screen. Pull the screen up, and you will likely see a wire mesh screen. The drain hole is behind the screen.
If you don’t see a trap, check around the outside edge of the sink cabinet. There could be a hidden drain tube that leads directly into the wall. In some cases, the drain tube is covered by a plastic cap. Pry off the cap and pull down on the drain tube to release it.
To determine whether the drain is clogged, use a flashlight to inspect the area around the drain opening. Do you see anything blocking the drain? Is there water flowing slowly? Does the water smell foul? If so, call a plumber immediately.
2: Clean or Unclog the Drain
When cleaning drains, boil some hot water and pour it down the drain. This will loosen up any clogs. If you have a thick clog, pour boiling water down them. You might hear some popping sounds as the clog softens. Then use a wire brush or a plunging tool to clean out the rest of the debris.
If you don’t have access to a plunger or a wire brush, you can use a toothbrush or even a credit card to push the clog out. Try not to put too much pressure on the pipe because you could crack the pipe. Instead, gently move the object around the drain.
To prevent corrosion, never mix bleach with other household products. Also, make sure to test your water supply regularly for chlorine levels. If you notice high levels of chlorine, add a few drops of vinegar to neutralize the chlorine.
3: Finish Up
The third step is to finish up the job. This includes replacing the gasket, tightening the bolts and making sure everything is working properly. If you’ve done everything correctly, there shouldn’t be anything left to do here. You’re finished! Congratulations!
How to do the Drain from Clogging or Freezing Up
The plumbing system in your home is one of the most important parts of your house. If you don’t take care of it properly, it could cause serious problems like water damage and even lead to flooding. Here are some tips to help keep your drains flowing smoothly.
You can clean the filter by opening the door and pouring some distilled water inside. Then close the door again and let it sit for about 15 minutes. After that, open the door again and wipe the filter with a dry cloth.Check the Drain Regularly
A clogged drain can lead to water damage, mold growth, and even sewage backup. If you suspect a problem, check it out immediately.

Here are some things to look for:
- 1. Is there standing water around the sink? This could indicate a leaky pipe or a broken connection.
- 2. Does the water level rise above the overflow hole? This indicates a blockage somewhere along the pipes.
- 3. Are there signs of corrosion? Corrosion occurs when minerals like calcium carbonate form on the inside walls of the pipes. These deposits can weaken the metal and make it susceptible to cracking or breaking.
- 4. Do you see any debris in the drain? Debris can restrict flow and cause the buildup of harmful bacteria.
- 5. Have you checked the filter? Make sure the screen is clean and free of obstructions.
- 6. What about the vent? Has it been blocked or damaged?Arrange Food Properly
Thus, if your freezer drain has become clogged with food debris, you may need to clean it out by following these simple steps.
Have you ever tried to clean a freezer drain?
If yes, then you probably know how messy they can get.
The problem is that cleaning them is really tricky because they are usually very narrow and deep.
You might also want to check out these other related questions: How to clean a refrigerator drain?
How to clean a sink drain?
How to clean my kitchen sink?
How to clean a bathtub drain?
How to clean an oven vent pipe?
How to clean a toilet bowl?
How to clean a explainer drain?
How to clean bathroom drains?
How to clean a dishwasher drain?
How to clean kitchen sinks?
How to clean a garbage disposal?
How to clean a washing machine drain?
How to clean toilets?
How to clean a tub drain?
How to clean under the sink?
How t
Unclogging a GE Freezer Drain – Guiding Steps
If you have a GE freezer drain, you can unclog it yourself using a plunger. To unclog a GE freezer drain, follow these steps: 1 Remove the plug from the bottom of the freezer drain 2 Place the plunger into the freezer drain 3 Push down on the plunger until it reaches the bottom of the freezer 4 Turn off the power 5 Wait 10 minutes 6 Unplug the freezer drain 7 Run cold water through the drain 8 Repeat step 6 if necessary 9 Plug the freezer drain back in
Step 1: Locate the Drain
To locate the drain, turn off the power switch and remove the plug from the bottom. Look for the drain hole near the bottom of the freezer. Step 2: Plunge the Drain Answer: Once you locate the drain hole, place the plunger into the hole. Press down on the plunger to force any debris out of the drain.
Step 2: Clean or Unclog the Drain
If the drain does not unclog after plunging, try using a wire brush or other tool to clean the drain. Step 3: Reinstall the Plug Answer: After cleaning the drain, reattach the plug to the outlet. Turn the power back on and test the drain again.
Step 3: Finish Up
After testing the drain, turn off the power and remove the plug from the outlet.
For Chest Freezers…
Step 1: Remove the door panel Step 2: Unplug the freezer Step 3: Drain the water Step 4: Close the door panel For Refrigerators… Answer: Step1: Open the refrigerator door Step2: Turn off the compressor Step3: Drain the water Note: Do not open the door while draining the water!
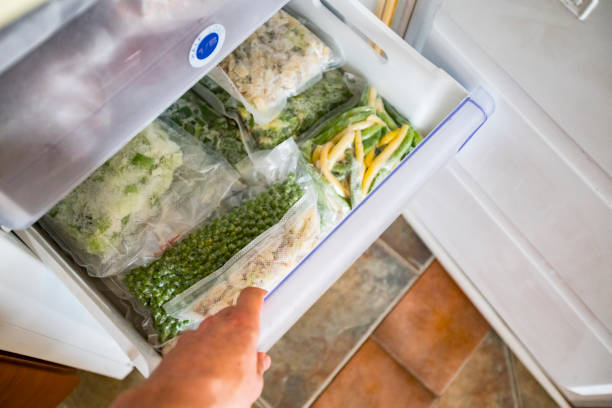
Preventing the Drain from Clogging or Freezing Up
If the drain line freezes, it could block the flow of water into the ice maker. This could result in the ice maker not working properly. To prevent this, turn off the power to the refrigerator and remove the door panel. Then, run cold water through the drain line until the drain line is clear.
1. Disable Energy Saver
To disable energy saver, press and hold the power button for 10 seconds. After that, release the power button. 2. Clear the Ice Maker Water Line Answer: Remove the door panel and run cold water through the ice maker water line until it clears.
2. Check the Drain Regularly
Check the drain regularly because if the drain gets clogged, it will not drain properly. 3. Clean the Filter Answer: Clean the filter periodically to ensure proper drainage of water from the unit.
Made of Silicone
Silicone is a nonstick material that does not stick to food. It is used in many applications such as cookware, bake ware, and even medical devices.
3. Arrange Food Properly
If you are using silicone bakeware, place the food on the bottom of the pan. This way, the food will be cooked evenly. 4. Use Nonstick Spray Answer: To prevent sticking, spray the surface of the pan with nonstick spray.
GE Refrigerator and Freezer Not Getting Cold [How to Fix]
To fix GE refrigerator not getting cold problem, you need to check if the thermostat is working properly. If the thermostat is not working properly, the refrigerator won’t get cold. So, you need to replace the thermostat.
No Water from GE Refrigerator [How To Fix]
If you see no water coming from the faucet of the refrigerator, you need to check whether the water line is clogged or not. If the water line is clog, you need to unclog it. No Ice From GE Fridge – No ice in the freezer Answer: You need to check if the ice maker is working properly. If it’s not working properly, there will be no ice in the freezer. You need to repair it.
GE Ice Maker Not Dumping Ice [How to Fix]
Check if the ice bin is full or empty. If the ice bin is full, you need to remove the ice from the bin. If the ice bin isn’t full, you need to clean the ice tray. GE Freezer Not Working Answer: First, check if the power supply is turned off. If the power supply is turned on, turn it off. Then, check if the circuit breaker is tripped. If the circuit breaker is not tripped, reset it.
GE Refrigerator Problems [How to Fix]
First check if the power supply switch is turned on. If the power supply switch is not turned on, turn it on. Then, check if there is any short circuit in the electrical system. If there is no short circuit, check if the fuse is blown. If the fuse is not blown, replace it. GE Washer Won’t Start Answer: First, check if the power source is turned on. If it’s turned on, turn it back off. Then, check whether the washer is plugged into the wall socket. If it’s plugged into the wall socket, unplug it.
GE Refrigerator Quit Working [How to Fix]
Check if the power source is switched on. If it’s switched on, turn it off. Check if the refrigerator is plugged into the wall outlet. If it’s plugged in, unplug it. Also, check if the fuse box is blown. If the fuses are not blown, replace them. GE Microwave Stopped Working Answer: First, turn off the power source. Then, check if the power cord is connected properly. If the power cord is not connected properly, disconnect it from the wall socket.
How to Clean a GE Water Cooler [Quick Guide]
First, remove any ice cubes or other items that could get stuck in the filter. Next, pour hot tap water into the bottom of the unit until it reaches the level of the drain hole. Let the water sit for about 10 minutes. Remove the drain plug and let the water flow out. Rinse the filter with warm water. Finally, run cold water through the system. How to Repair a GE Dishwasher 1 Unplug the dishwasher. 2 Open the door of the dishwasher. 3 Pull out the rack. 4 Disconnect the hose from the back side of the dishwasher. 5 Turn the knob to the right clockwise. 6 Push down the handle. 7 Release the latch. 8 Lift the front panel. 9 Remove the screws holding the panel in place. 10 Remove the panel. 11 Remove the two screws holding the top plate. 12 Remove the top plate. 13 Remove the three screws holding the motor assembly. 14 Remove the motor assembly. 15 Replace the top plate. 16 Replace the screws. 17 Replace the motor assembly. 18 Replace the screws. 19 Replace the top plate and reinstall the screws. 20 Plug the dishwasher back in.
GE Freezer Warm [How to Fix]
To fix the freezer, first turn off the power switch. Then, open the freezer door. Remove the ice tray. Remove the plastic liner from the bottom of the freezer. Remove the four screws that hold the freezer box together. Remove the freezer box. Remove the four screws holding the freezer pan in place. Remove the freezer pan. Replace the screws. Reinstall the freezer box. Replace the plastic liner. Replace the screws. Close the freezer door. Turn the power switch back on. How to Repair an LG Dryer First, unplug the dryer. Remove the lint trap. Remove the drum. Remove the belt. Remove the screws holding the drum in place. Remove the drum. Replace the belt. Replace the screws. Replace the drum. Install the drum. Replace the screws. Replenish the lint trap. Replace the screws. Reconnect the dryer cord. Plug the dryer back in. How to Repair the Washer 1 Unplug the washer. 2 Open the access panel. 3 Remove the screws holding the access panel in place. 4 Remove the access panel. 5 Remove the screws holding the tub in place. 6 Remove the tub. 7 Remove the screws holding the agitator shaft in place. 8 Remove the agitator shaft. 9 Remove the screws securing the agitator basket. 10 Remove the agitator basket and replace the screws. 11 Replace the agitator shaft and secure the screws. 12 Replace the access panel. 13 Replace the screws. 14 Reconnect the washer cord. 15 Plug the washer back in.
How do you drain a GE chest freezer?
If you notice a leaky freezer drain, you can try using a plunger to push the ice cubes back into the drain. However, if the problem persists, you should call a professional plumber to fix the issue.
Where is the drain pan in a chest freezer?
A chest freezer is a type of refrigerator that stores frozen foods. It consists of a freezer compartment and a refrigerated section. A chest freezer usually has two doors, one for the freezer and another for the refrigerator. In addition to the freezer and the refrigerator, a chest freezer also includes a door that leads to the storage area where the ice maker is located. This door is called the “drain pan” because it allows you to remove any leftover liquid from the ice cube tray.
How do you unclog a GE freezer drain?
If you have a GE chest freezer, you can easily drain it yourself. Simply remove the door panel and pull out the drawer. Then, lift the bottom tray off and slide it out. Lift the top tray off and remove the ice cube trays. Then, remove the plastic liner from the back of the unit. Finally, remove the front panel and place it on a flat surface. Now, simply pour hot water into the opening until the water level reaches the lowest point. Once the water level is low enough, turn off the faucet and let the water drain. This process takes about 30 minutes.

It's knowing what you're doing and having a good basic foundation.
That's why my mission is to teach you the fundamentals of great cooking...
So you can start creating delicious dishes without any rules or restrictions whatsoever.
With my step-by-step instructions, my unique insider secrets and techniques,
You'll be able to easily take ordinary food and make it extraordinary!
- How to Prolong the Life of Your Kitchen Appliances - December 22, 2024
- How Long does Yogurt Take to Freeze - May 5, 2023
- Top 10 best restaurants in Montana - May 1, 2023