Last Updated on November 8, 2022
Have you ever wondered why some bread taste better than others? The answer lies in their ingredients and baking techniques. Learn the basics to ensure your sourdough has the perfect flavor!

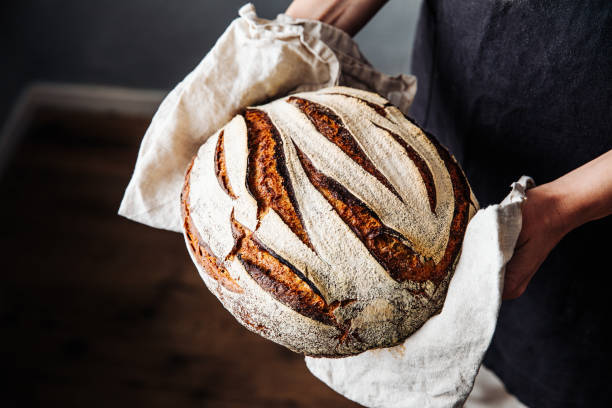
Sourdough is a type of yeast starter that gets its name from the French word souffre, meaning suffering or pain. This kind of bread requires time, patience, and effort to produce delicious loaves.
Many home bakers rely on commercial recipes because they don’t want to spend hours kneading dough. But these store-bought recipes aren’t always suitable for everyone. You should pay attention to certain things when creating your sourdough recipe.
How Long Should you Proof Sourdough for?
When you first start baking sourdough, it’s helpful to know what period to expect it to rise. This guide will give you some ideas about how long sourdough can proof.
Many factors are involved in the proofing process, such as the type of flour used and the water activity, and many variables affect the proofing process, like room temperature.
Deflate sourdough takes to rise. For example, different types of flour have varying water activities, meaning that they absorb moisture differently.
The amount of yeast in the dough affects the speed of fermentation and the length of time required for the dough to rise.
The best way to determine how long sourdough needs to rise is to see how it looks. If it’s golden brown, it’s probably ready to bake.
Time Guidelines for Proofing Sourdough
The process of making sourdough bread involves kneading the dough, fermenting it, shaping it into loaves, proofing it, baking it, cooling it down, and storing it. Each step requires specific times. For example, kneading takes about 10 minutes; fermenting takes up to 12 hours; shaping takes another hour; proofing takes 2 to 3 hours; baking takes 30 to 45 minutes; cooling down takes 15 to 20 minutes, and storage takes 24 to 48 hours.
To make sure you don’t end up with a soggy loaf, follow these basic guidelines:
1. Knead the dough for 10 minutes.
2. Let the dough rest for 5 to 10 minutes.
3. Ferment the dough for 12 to 18 hours.
4. Shape the dough into loaves.
5. Proof the dough for 2 to 3 hours.
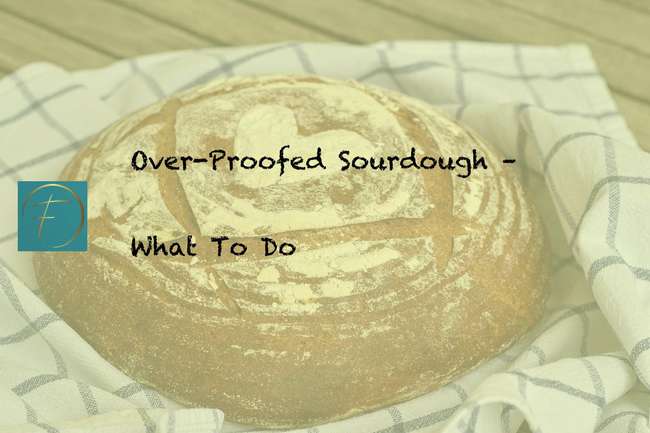
What Is Overproofed Dough?
Overproofed dough is essentially bread dough that’ll never rise properly. It’s usually caused by forgetting to check on it during the rising process. Or maybe you forgot to turn down the heat. Whatever the case, when you’ve got the over-proofed dough, you’re stuck with a loaf of flatbread that won’t ever rise again
How to Fix Over-proofed Dough?
Overproofed bread is one of those things we just don’t talk about. We know it happens, but no one wants to admit it. But what is over-proofed dough? Well, it’s basically bread dough that’s been left out overnight. And while some people think it’s delicious, others consider it a disaster waiting to happen. So how do you fix over-proofed dough? Let’s take a look.
When you make bread, there are three basic steps involved. First, you mix up the ingredients, including flour, water, salt, sugar, yeast, and whatever else you want to add. Then you knead the dough, stretch it into shape, and finally prove it. Once it’s ready to go into the oven, you put it in the pan, cover it with plastic wrap, and set it aside to rise.
But sometimes, the rising process goes awry. You might forget to check on it or accidentally turn off the heat early. Either way, the dough rises, but it doesn’t really rise much. Instead, it gets puffy, like a balloon. If this happens, you’re probably dealing with over-proofed dough.
Overproofing, the dough is when you overwork the dough before baking it. When done right, the over-proofing dough signifies that you’ve created something truly special. But when done wrong, it can lead to bread that falls apart too soon and doesn’t rise well. Here are some tips for fixing over-proofed dough…
1. Don’t Use Too Much Yeast
Bread recipes typically call for 1/4 teaspoon of yeast per cup of flour – but you may find that you need to adjust things based on the type of flour you’re using. Many bread flours contain gluten, which makes the dough more challenging. To compensate, you’ll need to add more water to the recipe.
2. Check Your Temperature
It’s best to bake your bread between 180°F and 200°F. Bread baked too hot will dry out quickly and lose its structure. Baked bread also needs the right amount of moisture so that it rises properly. If your oven runs hot, try setting the temperature control dial to 350°F instead of 400°F.
3. Add More Sugar
Adding sugar to your bread might make it taste sweeter, but sometimes it makes the dough harder to handle. Adding just a little bit of extra sugar to your dough will give it a nice sheen after rising but won’t make it easier to knead. Try adding 2 teaspoons of sugar per cup of flour instead.
4. Lower the Heat
Lowering the heat on your oven will allow the dough to cook faster, resulting in a loaf that’s ready sooner. However, the crust will turn out tough and chewy if your oven runs too cool. Set your oven to 450°F and reduce the temperature to 375°F.
5. Let the Loaf Rise Long Enough
After you remove your bread from the oven, let it sit for 5 minutes before slicing. The residual heat trapped inside the loaf will continue to expand, causing it to grow taller. Slice it immediately to avoid having to deal with soggy bread.
Make a perfectly proofed sourdough bread to fill your tummies with the guide above!
What would happen if you tried to prove something was sourdough bread without knowing anything about baking or bread?
Would you get the same result?
Sourdough bread is a type of yeast bread that has risen naturally from a mixture of flour and water.
The dough is left out at room temperature until it rises and becomes firm.
This method of proofing allows the bread to develop its unique flavor.
To achieve the perfect texture, you should mix the ingredients together and let them rise overnight.
If you want to try this recipe, follow these steps: 1 Mix the ingredients together thoroughly.
2 Cover the bowl with plastic wrap and leave it somewhere warm about 70 degrees F
What Is Proofing?
Sourdough breads are yeast leavened breads that are fermented with natural starter cultures. These starters are usually composed of wild yeasts and bacteria found in flour and air. In order to produce sourdough breads, these starters are mixed into dough along with other ingredients such as salt, sugar, and sometimes milk. After mixing, the dough is allowed to rest for several hours or overnight until it doubles in bulk. This resting period allows the wild yeast and bacteria to multiply and ferment the dough. During fermentation, the dough develops flavor and texture. Once the desired level of acidity is reached, the dough is shaped into loaves and proofed or rested for several hours or overnight. Finally, the loaves are baked.
Consequences And Fixes For Over-Proofed Sourdough
Overproofing occurs when the dough rises too quickly during the proofing process. It is caused by improper handling of the dough or by using too much yeast. Overproofing results in a loaf that is dense and chewy. To fix this problem, simply reduce the amount of yeast used in the recipe.
How To Fix Over-Proofed Sourdough
Sourdough breads are usually made from a combination of flour and water. Yeast is added to the mixture to help produce carbon dioxide gas, which helps leaven the dough. This method works well for making breads because it allows the dough to rise slowly and evenly. However, if the dough is allowed to rise too fast, the gas produced by the yeast will build up faster than the dough can absorb it. As a result, the dough becomes very heavy and dense. To fix this problem, simply decrease the amount of yeast used. Also, try adding additional ingredients such as milk, eggs, butter, sugar, salt, or other flavorings to the dough. These ingredients will slow down the rate at which the dough rises.
The Indentation Test
If you notice indentations in the top crust of your sourdough bread, it could mean that the loaf was proofed too long. Breads that are proofed too long tend to get hard and dry. To test whether your bread is ready, press the center of the loaf gently with your finger. If the indentation remains after pressing, your bread needs to be proofed longer.
The Spread Test
To check if your dough is ready, spread a thin layer of dough onto a piece of parchment paper. Let it sit for about 10 minutes. Then, lift the edge of the dough and see how far it spreads. It should be able to stretch easily and not tear. If it tears, let it rest for another 5 minutes.
The De-Gas Test
To test whether your dough is done, take a teaspoon of dough and place it in the center of a plate. Cover the top of the dough with a clean cloth towel. Leave the covered dough alone for 20 minutes. After 20 minutes, remove the towel and gently press down on the dough. If it springs back immediately, it’s ready. If it doesn’t spring back, leave it longer.
The Slice Test
To determine if bread is done, slice off a piece from the middle of the loaf. If it sounds hollow when tapped, it’s ready.
Easy Fixes For Over-Proofed Sourdough
If you’ve ever tried to bake sourdough bread, you know how hard it is to get the dough right. It takes patience and practice to perfect your sourdough recipe. But even after you’ve mastered the art of making perfect sourdough bread, sometimes you’ll still end up with a batch that’s a bit too proofed. This happens because the yeast needs to ferment longer than usual to produce enough carbon dioxide gas to leaven the dough. That extra fermentation time can lead to a slightly overproofed loaf. Here are some easy fixes for overproofed sourdough bread.
Re-Knead It
To fix overproofed sourdoug bread, simply re-knead the dough. Re-kneading involves kneading the dough again until it becomes smooth and elastic. This process helps the gluten develop properly, giving the bread a better texture. Add More Water Answer: Adding more water to the dough can help prevent overproofing. To do this, take a piece of dough and roll it into a ball. Then flatten the ball between two pieces of parchment paper. Place the flattened dough in a bowl and add about 1/2 cup of warm water. Cover the bowl with plastic wrap and let sit for 10 minutes. After 10 minutes, remove the plastic wrap and knead the dough again. Repeat this step three times.
Using A Baking Tin
If you bake your sourdough bread in a baking tin, you can avoid overproofing. Simply place the dough in a greased 9×13 inch baking dish and cover with plastic wrap. Let rise for 30 minutes. Remove the plastic wrap and preheat oven to 425 degrees Fahrenheit. Bake for 20 minutes, then reduce the heat to 350 degrees Fahrenheit and continue baking for another 15 minutes.
Tactical Slicing
To slice breads, I recommend using a bench scraper. It’s a tool that looks similar to a pizza cutter but is used to cut bread into slices. Bench scrapers are inexpensive and easy to find online or at any hardware store. To use a bench scraper, simply lay the loaf of bread on top of the bench scraper and run the blade along the length of the loaf. This will give you perfectly sliced bread every time.
Tips and Tricks
If you are looking for a good knife set, you can check out our guide here.
Will yeast expand an over-proofed sourdough while baking?
Yes, if you bake the bread at a higher temperature, the dough will expand. This is because the fermentation process requires heat to occur. So, if you bake the loaf at a higher temperature, it will expand. But, if you bake it at a lower temperature, it won’t expand. How to Make Homemade Bread 1 Mix together 1 cup warm water, 2 teaspoons sugar, 1 teaspoon salt, and yeast. Let stand until frothy about 10 minutes.
Can you mix over-proofed dough with adequately proofed dough?
No, you cannot mix over-proofed and under-proofed dough. Over-proofing occurs when the yeast gets too hot and dies off. Under-proofing happens when the yeast doesn’t get enough time to activate properly. How to Make Sourdough Bread 1 In a bowl, combine flour, salt, and yeast; stir well. Add water and beat with a wooden spoon until smooth. Cover tightly with plastic wrap and let rest 20 minutes.
Does over-proofed dough smell bad or taste differently?
Over-proofed dough smells different from under-proofed dough because the yeast has died off and the bread isn’t rising anymore. It’s not necessarily bad tasting but it does have a slightly sour flavor. What is the difference between active dry yeast and fast acting yeast? Answer: Active Dry Yeast is what we call “instant” yeast. This type of yeast needs to be dissolved in warm liquid water and left to sit for about 10 minutes before adding to the other ingredients. Fast Acting Yeast is what we refer to as “quick rise” yeast. This yeast is usually found in packets and is added directly to the dry ingredients.

It's knowing what you're doing and having a good basic foundation.
That's why my mission is to teach you the fundamentals of great cooking...
So you can start creating delicious dishes without any rules or restrictions whatsoever.
With my step-by-step instructions, my unique insider secrets and techniques,
You'll be able to easily take ordinary food and make it extraordinary!
- How to Prolong the Life of Your Kitchen Appliances - December 22, 2024
- How Long does Yogurt Take to Freeze - May 5, 2023
- Top 10 best restaurants in Montana - May 1, 2023