Last Updated on November 8, 2022
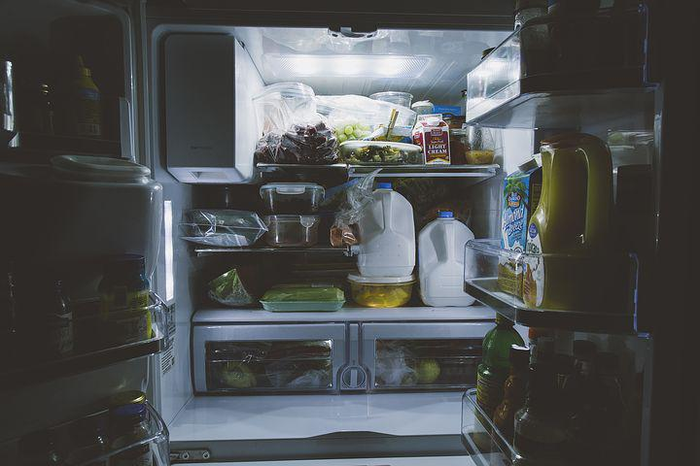
A Thermador refrigerator is one of the most popular brands out there, and it’s easy to see why. They’re high quality appliances, built to last, and come with warranties that usually cover everything except the door gaskets. But sometimes, problems do arise. In fact, we’ve found over 50 common issues with Thermador refrigerators, including leaks, water damage, and broken doors. If you want to avoid those problems, here’s what you need to know about Thermador fridges.
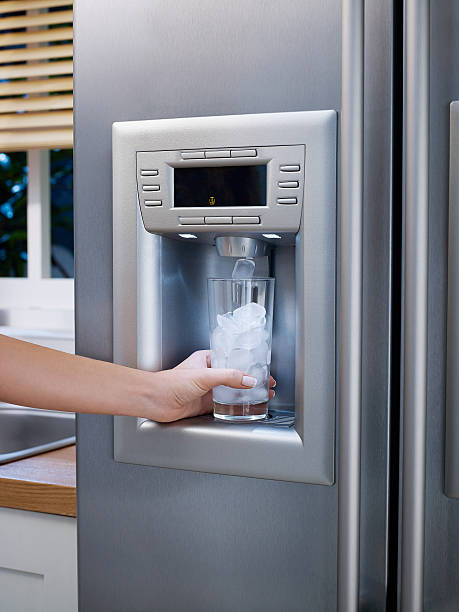
Thermador Refrigerator Water Dispenser Not Working – What to Do
If you are trying to use the Thermador fridge water dispenser and it isn’t working, there could be several reasons why this might happen. To figure out what exactly is wrong, here are some things you can try.
Check the power supply
The most likely cause of the issue is a faulty power supply. You’ll want to check whether the power cord is plugged into the wall socket correctly, as well as make sure that the outlet itself is functioning properly.
Try resetting the thermostat
If the problem occurs while the temperature is set to “off”, it could mean that the thermostat needs to be reset. Resetting the thermostat will usually solve the issue.
Clean the filter
A dirty filter could block the flow of air to the evaporator coil, causing the ice maker to stop producing ice. This could lead to the water dispenser not being able to work.
Door Switch
The door switch is located behind the front door handle. If you replace it, you’ll find yourself having to change the light bulbs every few months because the light bulb burns out.
Dispenser Switch
A multimeter should be used when checking dispenser switches. If you see a reading above 10 volts, it indicates there is something wrong with the switch. To replace the switch, turn off power to the machine and unplug the wire harness. Then, take out the old switch and install the new one. You may want to use a screwdriver to hold the switch while turning it into place. After installation, reconnect the wires and test the switch again. If you find that the switch does not work properly, consult a technician.
Check the Dispenser Control Board
The dispenser control board is located under top cover. If you see any signs of damage, replace it immediately. Replacement parts are available online.
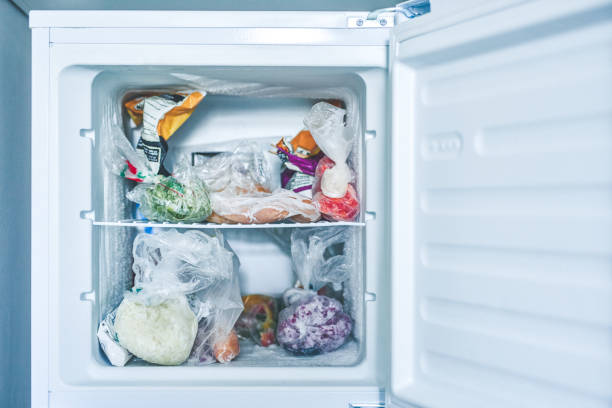
Check the Ice Level Control Board
Ice buildup in your freezer should be considered a serious problem. If you are noticing ice buildup, close the freezer door immediately and do not open it again until you fix the issue. This will prevent further damage to your food and help maintain optimal temperatures inside the freezer.

If you notice ice buildup in your freezer, check the following areas for potential problems:
• Door seals – Check the seals around the door frame and around the door itself. These seals are critical to keeping cold air inside the freezer and warm air outside. If one of these seals fails, the cold air will leak out and cause the ice to form.
• Temperature control board – Make sure the temperature control board is working properly. If there is a malfunction, the temperature could rise too high and melt the ice.
• Humidity controls – The humidity level in your freezer needs to remain constant. If the humidity level fluctuates, the ice will grow thicker and become harder to break up.
• Food storage containers – Store your frozen foods in sealed containers. If you see condensation forming on the exterior of the container, this indicates moisture inside the container. You must keep the moisture away from the food to avoid bacteria growth.
• Freezer drawers – Keep your freezer drawer closed while storing items inside. Opening the drawer allows warm air into the freezer, causing the ice to thaw.
Here are some tips to help you check if the dispenser problem is temporary:
Clean the Ice Maker Regularly
Clean the ice maker every week or so to prevent buildup of mould and bacteria. If the ice maker is not working properly, check out our guide here. You can use a damp cloth, warm water, soap, or even vinegar. Some people prefer to wipe down the inside of the ice maker with a wet rag.
Don’t Leave the Door Open While Running
If you leave the door open while your ice maker is running, you could end up with a mess. When the ice maker runs, it creates cold air that travels into the room where the ice maker is located. This cold air can cause moisture to condense on surfaces like windows and doors. As soon as the ice maker stops making ice, close the door immediately.
Check Water Levels Before Starting Cycle
Before turning on your ice maker, make sure there is enough water left in the bin. If you run low on water, the ice maker won’t work correctly. To find out how much water is left, look at the bottom of the bin. If it looks empty, add more water.
Freezer Temperature
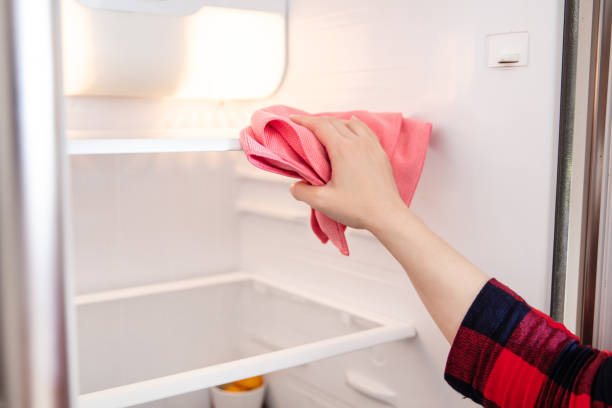
Freezers should always be unplugged before cleaning. This prevents moisture buildup inside the freezer, which could cause mould growth. Mouldy foods are unsafe to eat, and it can make you sick.
A freezer without a door lock freezes food faster. When you use a refrigerator or freezer without a locking mechanism, you expose yourself to potential injury from someone opening the door while you’re inside.
If you don’t know how to adjust the temperature, call an expert immediately. You don’t want to find out later that you’ve left your food frozen solid because you didn’t know how to change the settings.
How to Unlock Thermador Refrigerator Water Dispenser
Thermador water dispensers are notoriously difficult to open. But thanks to a few simple steps, you can unlock yours without having to call a locksmith.
First turn off the power switch and disconnect the power cord. Next, pull the refrigerator door handle toward you. Then push down on the door handles until it clicks, and lift the door handle. Release the door handle. Now use the tip below to unlock your Thermador fridge. This is how you can easily solve the dispenser problem of your Thermador Refrigerator.
Are you having trouble finding the Thermador refrigerator dispenser parts?
If yes, then you’ve come to the right place.
This article contains the answers to some common questions regarding Thermador refrigerator dispensers.
The Thermador brand has become synonymous with high quality appliances.
They are known for their sleek design and innovative features.
Their refrigerators are also very reliable and durable.
This article provides information on the Thermador refrigerator parts.
It also discusses the problems associated with them
Thermador Refrigerator Water Dispenser Not Working – What to Do
1 First check if the refrigerator dispenser is working properly. Check if the ice maker is working fine. If not, replace the ice maker. 2 Next, check if the refrigerator dispensing system is working properly. Turn off the power supply to the refrigerator. Open the door and remove the refrigerator dispenser from the refrigerator. Remove the cap from the bottom of the refrigerator dispenser. Look for any signs of leaks or damage. Replace the cap and turn on the power supply to the fridge. Close the door and wait for about 15 minutes. If the problem persists, call a professional service technician.
1. Door Switch
If the switch is located near the door handle, try switching the door switch. If the switch is located on the wall, try replacing the light bulb. 2. Light Bulb Answer: If the light bulb is burned out, replace it.
2. Dispenser Switch
Try replacing the dispenser switch if the switch is not working properly. 3. Water Filter Answer: Replace the filter if the water does not taste good after filtering.
3. Dispenser Control Board
Replace the control board if the dispenser is not working properly. It is located under the top panel. 4. Discharge Valve Answer: Replace the discharge valve if the water flow is slow.
4. Water Inlet Valve
Replace the water inlet valve if the water flow rate is low. 5. Drain Valve Answer: Replace drain valve if the water level is low.
5. Water Tube
Water tube is used for heating water. It is very important to check the water tube every year. 6. Heat Exchanger Answer: Heat exchanger is used for cooling the air.
Thermador Ice Dispenser Not Working – How to Fix
If the ice dispenser does not dispense ice cubes, try removing the ice tray from the freezer and see if the ice dispenser works properly. If the problem persists, contact Thermador customer service. 7. Heater Element 8. Fan Motor
1. Water Inlet Valve
Thermador ice dispenser not working – how to fix Thermador ice maker repair
2. Icemaker Assembly
1. Water Inlet Valve: Check if the water inlet valve is open properly. It could be clogged with debris. Clean the filter and check again. If the problem persists, replace the water inlet valve.
3. Icemaker Module
4. Ice Maker Door Handle: Remove the ice maker door handle from the top of the module.
4. Door Switch
1. Remove the ice maker door handle see picture from the top of the unit. 2. Disconnect the power cord from the back of the unit.
5. Ice Level Control Board
1. Remove the door switch from the top of the ice maker. 2. Disconect the power cord from the bottom of the unit.
6. Icemaker Mold Thermostat
1. Remove the door switch the black plastic piece from the top of the icemaker. 2. Disconnect the power cord from the back of the icemaker. 3. Remove the icemaker mold thermostat. 4. Remove the two screws holding the mold thermostat in place. 5. Lift the mold thermostat off the icemaker. 6. Replace the mold thermostat. 7. Reattach the screws. 8. Reconnect the power cord. 9. Put the door switch back into position. 10. Turn the icemaker on. 11. Check the level of ice in the bin. 12. Adjust the level if necessary. 13. Close the door. 14. Turn the icemaker off. 15. Clean the ice mold thermostat. 16. Store the icemaker mold thermo stat. 17. Reset the icemaker. 18. Reconnect the power cable. 19. Turn the icemaker back on. 20. Check the level of the ice again. 21. Repeat steps 16 through 20 until the desired level of ice is achieved. 22. Turn the
7. Icemaker Switch
1. Remove the door switch from the bottom of the icemaker. 2. Disconnect the wire connector from the back of the ice maker. 3. Remove the two screws that hold the ice maker mold thermostat in position. 4. Lift the mold thermosstat off the ice maker. 5. Replace the mold thermosstat. 6. Reattach the screws and reconnect the wire connector. 7. Reconnect the power supply cord. 8. Put the door switch in position. 9. Turn the icemaker switch on. 10. Check the level of water in the bin. 11. Adjust the level if needed. 12. Close the door. 13. Turn the icemaker button off. 14. Clean the ice maker mold thermosstat. 15. Reset the icemaker switch. 16. Reconnect the power connection cord. 17. Turn the icemaker box on. 18. Check the level of liquid in the bin. 19. Repeat steps 16 through 18 until the desired level of water is achieved. 20. Turn the icemaker
8. Freezer Temperature
1. Open the freezer door. 2. Unplug the freezer. 3. Remove any frozen items from the freezer. 4. Remove the three screws holding the freezer door in place. 5. Pull the freezer door open. 6. Remove the four screws holding the freezer liner in place. 7. Slide the freezer liner out of the freezer. 8. Remove the four screws securing the freezer liner to the freezer wall. 9. Slide the freezer liner into the freezer. 10. Replace the screws and reattach the freezer liner. 11. Replace the screws and plug the freezer back in. 12. Turn the freezer switch on. 13. Check the temperature gauge. 14. Adjust the temperature setting if necessary. 15. Close the freezer door. 16. Turn the freezer switch off. 17. Clean the freezer liner. 18. Reset the freezer switch. 19. Plug the freezer back in. 9. Door Lock Answer: 1 Remove the two screws holding the door lock in place. 2 Remove the door lock. 3 Replace the screws and reinstall the door lock. 4 Reinstall the screws. 5 Reconnect the door lock cable. 6 Connect the door lock cable to the door lock. 7 Plug the door lock cable into the door lock. 8 Turn the door lock switch on. 9 Check the door lock status light. 10 Adjust the door lock if necessary. 11 Close the door. 12 Turn the door lock off. 13 Clean the door lock. 14 Reset the door lock. 15 Reconnect the door latch cable. 16 Connect the door latch cable to the door latch. 17 Plug the door latch cable into the door latch. 18 Turn the door latch switch on. 19 Check the door lock light. 20 Adjust the door lock status light if necessary. 21 Close the door.
9. Water Filter
1 Disconnect the water supply line. 2 Remove the filter cartridge. 3 Install the new filter cartridge. 4 Reconnect the water supply line. 10. Dishwasher Drain Line Answer: 1 Unscrew the drain hose clamp. 2 Loosen the dishwasher drain hose clamp. 3 Remove the old hose clamp. 4 Insert the new hose clamp. 5 Tighten the hose clamp. 6 Screw the drain hose clamp back onto the drain pipe. 7 Screw the drain hose clamp into the dishwasher. 8 Attach the dishwasher drain hose to the dishwasher drain pipe. 9 Tighten the drain hose clamp.
How to Unlock Thermador Refrigerator Water Dispenser
1 Turn off the power switch. 2 Pull the refrigerator door handle toward you. 3 Push down on the refrigerator door handle until it clicks. 4 Lift the refrigerator door handle. 5 Release the refrigerator door handle. How To Replace A Kitchen Sink Faucet Handle Answer: 1 Open the faucet and remove the washer. 2 Remove the old washer. 3 Place the new washer in place. 4 Reinstall the faucet. 5 Close the faucet.
How do you troubleshoot a refrigerator water dispenser?
If you notice that the water dispenser isn’t working properly, you should check if the faucet itself is leaking. This could happen if the rubber washer around the spout is worn down. In addition, the rubber gasket that seals the spout from the faucet could be damaged. If the rubber gasket is damaged, you should replace it. If the rubber gaskets are not damaged, but the spout still leaks, you should clean the spout using soap and warm water. Make sure that the spout is completely dry after cleaning. If the problem persists, you should call a professional plumber.
Why is my ice and water dispenser not working?
Ice and water dispensers are very common devices used in homes. They are usually found in kitchens and bathrooms. These machines are designed to dispense cold or hot water from a reservoir into a cup or glass. Most of these machines are connected to a faucet or tap. However, if the machine does not work properly, it could lead to several problems such as leaking, clogged pipes, or frozen valves. To fix the problem, you should check the following items: 1 Is the faucet turned off? 2 Is the water supply line free of obstructions? 3 Is the water filter clean? 4 Are the connections between the faucet and the machine secure? 5 Is the water level in the reservoir full? 6 Is the ice maker working properly? 7 Is the ice tray empty? 8 Have you tried turning the machine off and back on again? 9 Do you have any leaks around the machine? 10
How do I fix my refrigerator water dispenser?
Refrigerator water dispensers are designed to provide cold water from the refrigerator. However, if the unit does not dispense any water after several minutes, check the following: 1 Make sure the faucet is turned off. 2 Check the filter and replace if necessary. 3 Reset the timer. 4 Clean the ice maker. 5 Replace the ice tray. 6 Remove the ice trays and clean them. 7 Check the thermostat. 8 Reset the thermostat. 9 Check the water level in the reservoir. 10 Check the water supply line. 11 Check the drain hose. 12 Check the drain pump. 13 Check the drain valve. 14 Check the drain pipe. 15 Check the drain pan. 16 Check the drain plug. 17 Check the drain tube. 18 Check the drain valve handle. 19 Check the drain valve lever. 20 Check the drain valve spring. 21 Check the drain valve stem. 22 Check the drain valve gasket. 23 Check the drain

It's knowing what you're doing and having a good basic foundation.
That's why my mission is to teach you the fundamentals of great cooking...
So you can start creating delicious dishes without any rules or restrictions whatsoever.
With my step-by-step instructions, my unique insider secrets and techniques,
You'll be able to easily take ordinary food and make it extraordinary!
- How to Prolong the Life of Your Kitchen Appliances - December 22, 2024
- How Long does Yogurt Take to Freeze - May 5, 2023
- Top 10 best restaurants in Montana - May 1, 2023