Last Updated on November 8, 2022
You’ve tried baking bread at home and now you want to share your delicious creations with friends and family. Unfortunately, your dough has turned out sticky instead of smooth and fluffy. Why does sourdough starter get sticky after being stored?
A true sourdough starter is simply flour mixed with water and yeast and left to ferment. This simple recipe makes a great base for homemade pizza crust or even French toast. The key to successful baking is maintaining a consistent temperature throughout the entire process. If you don’t let the mixture cool down completely before adding yeast, then the yeasts won’t develop properly. That leads to a sticky dough.
To ensure your starters stay moist and fresh, store them inside a container lined with paper towels. Add some flour and water to the jar every time you feed it. Once you’ve finished using your starter, discard the liquid and put the remaining ingredients into another jar. Then add enough water to cover the flour. Store these jars in a warm place (like your oven) until they start bubbling.
Why is my sourdough so sticky?
First we must determine whether or not there is an issue with our starter. If it seems to be alive and kicking, then we can consider our next step.
Sourdough starters should be kept warm for easy mixing and rising. However, when you bake with sourdough, it becomes more important than ever to keep a close eye on temperature. In general, most bread recipes call for a rise time of anywhere between two days and three weeks.
The longer the dough rises, the fluffier and lighter its texture tends to be, which means that its flavor compounds tend to develop better. But, if you do happen to find yourself baking with sourdough right away, make sure to cover your loaves with plastic wrap or cling film while they rise. This prevents them from drying out quickly, which could lead to cracks and holes.
For best results, let your sourdough rise slowly. For example, instead of waiting overnight, let your dough sit on the counter for eight hours. This allows fermentation to begin naturally without any added yeast.
Next, remove the dough from the bowl and knead it thoroughly. Next, divide the dough into six equal portions. Wrap each portion in aluminum foil and place it in a large zip-top bag. Make sure your bags are airtight. Then place them in the refrigerator overnight. When you wake up the next day, uncover each bag and gently stretch the contents from side to side and up and down with both hands. This helps release gas bubbles trapped inside. After stretching, fold the edges of the paper together and replace it in the freezer. Repeat these steps twice more.
Finally, transfer the frozen dough to a lightly oiled bowl and put it into your oven. Bake for 45 minutes at 350 degrees Fahrenheit (180 degrees Celsius). Remove the bread from the oven and immediately brush it generously with butter or olive oil. Let cool for 20 minutes before slicing.
To avoid sticky sourdough, prepare your starter well ahead of time. Use a small amount of flour to moisten the starter. Mix it well and add water to reach 1 cup. Cover with cheesecloth and leave it somewhere warm. Once your starter begins bubbling, stir it occasionally and increase the amount of flour slightly if necessary. This way, you don’t have to worry about adding too much flour during the initial preparation phase.
After four days, taste the mixture. If it tastes sour, mix in additional flour until it reaches the desired consistency. Now it’s ready to go.
Should Sourdough be sticky?
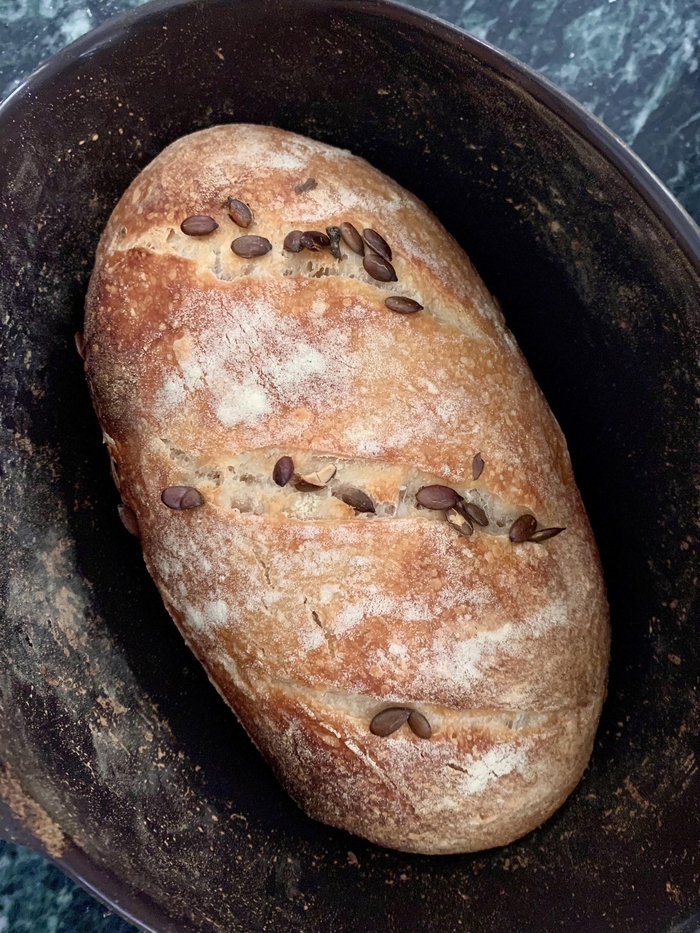
Yes, sourdough bread is usually sticky because of how long it takes to get ready. It is not always difficult to clean but it does need patience. To help prevent stuck sourdough bread try using parchment paper or plastic wrap. This way you won’t have to worry about sticky hands or messy counters!
How do you ‘fix’ sticky Sourdough?
I generally fix my sourdough breads by adding a pinch of baking soda (1/2 teaspoon) to the dough while mixing it. This helps release any residual acidity from the starter, resulting in a soft crumb. You can also try using a touch of white vinegar instead of baking soda. Vinegar contains acetic acid, which is similar to lactic acid found in sourdough cultures. Both acids help loosen gluten strands allowing them to relax and reduce stickiness during kneading. I hope these tips were helpful! If you know someone who loves sourdough bread recipes, send them my way.
How to handle sticky Sourdough with ease?
The technique used to knead bread doughs varies depending on what type of bread you wish to make. For regular leavened breads such as baguettes, ciabattas, and focaccia, the method is similar to making any other dough. To mix the ingredients together, stir the dry ingredients into the wet ingredients. Next, combine the two batches until a soft, smooth, elastic dough forms. Divide the dough into 2 portions, shape each portion into balls, flatten the ball slightly using the palm of your hand, and place on greased baking sheets. Cover loosely with plastic wrap and let rest for 15 minutes. After resting, lightly flour a rolling pin and roll the dough balls flat. Bake according to instructions.
For yeast breads such as sandwich loaf, pizza crust, croissants, and cinnamon rolls, a different approach is required because the initial mixing does not involve the addition of yeast. Instead, the yeast is already present within the bread dough. Once mixed, the dough needs to proof (rise) for about 1 hour. This allows the gluten protein network to develop and become strong enough to support the weight of additional rising. Then, divide the dough into 4 equal pieces, shape each piece into a round loaf, and place on greasing pans. Cover loosely with plastic film and let sit overnight. The next day, preheat the oven to 425° F. Uncover the loaves and bake for 20–25 minutes or until golden brown. Remove from pans immediately and cool completely on wire racks before slicing.
Sourdough starter is one of those things that seems simple enough but can really get complicated if you don’t follow directions properly.
If you’ve ever tried making sourdough bread at home, you’ll know that it takes time, patience, and practice before you get it right.
If you’re having trouble with your starter, here are some tips to keep in mind.
Here are some tips to keep your starter healthy and happy.
Your sourdough is
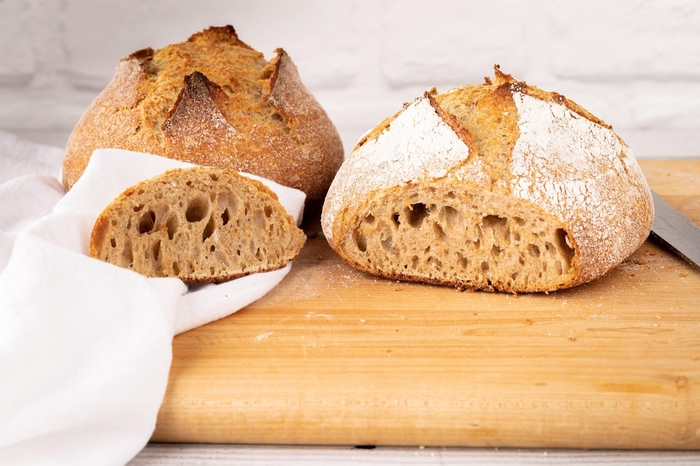
Sourdough bread is a type of yeast-leavened bread that uses wild yeasts found naturally in flour and air to produce a distinctive tangy flavor. It takes about four days to develop a good sourdough starter. If your sourdough starter seems sticky, try adding a bit more flour to the mixture. Also, if you notice any mold growing on top of the starter, discard it immediately.
Why Your Sourdough Is Sticky
Sourdough breads are known for being sticky. This is because the yeast produces alcohol during fermentation. Alcohol is what gives sourdough bread its characteristic tangy flavor. However, if the dough gets too moist, the alcohol produced by the yeast will evaporate into the air, leaving behind a sticky texture. To avoid this problem, try using a dry starter instead of a wet one. A dry starter is simply flour mixed with water and left to ferment. It’s important to note that a dry starter needs to be refreshed every day or two. Once you’ve started making your own sourdough bread, you’ll see why it’s worth the effort!
High Hydration
If you’re looking for a loaf of bread that’s soft and tender, but not overly sweet, you may want to try baking a loaf of bread with a higher hydration level. Breads with a higher hydration tend to bake faster, resulting in a softer crumb. In addition, breads with a higher hydrated batter will absorb more moisture from the oven, resulting in a moister crust.
Insufficient Gluten Development
A gluten free diet is becoming increasingly popular among people who suffer from celiac disease. Celiac disease is an autoimmune disorder where the body attacks itself after consuming gluten, a protein found in wheat, barley, and rye. People with celiac disease cannot tolerate gluten because it damages the lining of the intestines. This damage prevents the absorption of nutrients and leads to diarrhea, weight loss, and other symptoms.
Dry Hands
Dry hands are caused by dehydration. Dehydration occurs when our bodies lose more fluids than we take in. It happens when we sweat less than usual, drink less than normal, or if we’re exposed to extreme temperatures. Dehydrated skin looks dry, cracked, and scaly. It’s usually accompanied by itching and burning sensations. If you notice these signs, it’s important to drink plenty of fluids to prevent further problems.
The Flour You’re Using Isn’t Appropriate
Flours vary widely in their protein content. For instance, wheat flour contains about 12% protein while oat flour contains only 3%. In addition, flours differ greatly in their moisture content. Oats are very low in moisture, but wheat flour is quite moist. This means that when you bake with different types of flour, the results can vary significantly. For example, baking bread with oatmeal flour will result in a loaf that is dense and chewy. Baking bread with whole wheat flour will give you a softer product. So, how do you know what type of flour to use? Look for the ingredient label. Whole wheat flour will always list “wheat flour” or “whole wheat flour” as the first ingredient. White flour will list “all purpose flour” or ‘white flour’ as the first ingredient. You can also check the nutritional information on the back of the package. A nutrition label will tell you the percentage of protein, fat, carbohydrates, fiber, and other nutrients found in each serving.
Careless Handling
It is important to wash your hands after handling raw meat. Raw meat carries bacteria that could cause illness if not properly handled. Wash your hands thoroughly with soap and warm water. After washing, dry your hands well using a clean towel. If you are working with raw meat, wear gloves. Gloves help prevent contamination from bacteria that may be present on your skin. Wear disposable latex gloves if you are cleaning poultry. When preparing raw meat, avoid touching your eyes, nose, mouth, or any cuts or wounds on your body. Also, avoid eating uncooked meats or drinking unpasteurized milk.
Overfermentation
Over fermentation occurs when yeast cells multiply rapidly and produce alcohol. This process usually happens during storage or transportation of alcoholic beverages. It is caused by improper storage conditions such as excessive humidity, lack of oxygen, and inadequate light exposure. Over fermentation produces off flavors and reduces the quality of the beverage. Bacteria
Should Sourdough Be Sticky?
Sourdough breads are sticky because of the natural yeasts present in the dough. Yeast is a single celled organism that feeds on sugars and starches found in flour. As long as the right amounts of sugar and starch are available, the yeast will continue to feed and multiply. Eventually, the yeast cells will become millions of times larger than normal bacteria. These large cells are called “baker’s yeast” and are responsible for leavening the dough. If the yeast is not fed enough sugar and starch, it will die and leave behind dead yeast cells. These dead cells are known as “flor” short for flocculent and are very noticeable in sourdough breads. Flor is harmless but it does affect the taste of the bread. How Do I Make Bread Dough Rise?
How Do You ‘Fix’ Sticky Sourdough?
To fix sticky sourdough breads, you need to increase the amount of sugar and starch in the recipe. This will allow the yeast to multiply quickly and produce lots of carbon dioxide gas. Carbon dioxide gas helps the dough expand during baking.
How To Handle Sticky Sourdough With Ease
Sticky sourdough breads are usually caused by insufficient mixing of the ingredients. In order to get rid of sticky sourdough bread, mix the ingredients thoroughly. Mixing the ingredients well ensures that the gluten strands are evenly distributed throughout the dough. How To Make A Better Sourdough Bread
Be Quick and Confident
To make a better sourdough bread, you need to know how to handle sticky sourdough with ease. Here we share some tips about how to handle sticky sour dough with ease. 1 Be quick and confident. 2 Use a bowl scraper to scrape down the sides of the bowl.
Use A Dough Scraper
Sourdough bread is a type of bread that is prepared using natural starter. It is a mixture of flour and yeast that is used to ferment dough. Sourdough bread is usually baked in a wood oven, but it can also be cooked in a regular oven. This type of bread requires a long fermentation period. During this process, the dough gets very sticky and needs to be handled carefully. To avoid getting stuck, you should follow these steps: 1. Mix the ingredients well. 2. Add enough water to form a soft dough.
Start With The Stretch And Fold
To stretch and fold the dough, you need to roll the dough into a ball shape. Then, flatten the dough by stretching it from the center outward. Next, fold the dough in half and repeat the same process again. After repeating this step three times, you will get a smooth and even surface. 3. Cover the dough with plastic wrap and let it rest for about 30 minutes. 4. Roll the dough into a ball again. 5. Repeat the previous steps until you reach the desired thickness. 6. Let the dough rise for another 45 minutes. 7. Preheat the oven to 450°F 230°C. 8. Bake the bread for 15 minutes. 9. Remove the bread from the oven and brush it with olive oil. 10. Sprinkle salt and pepper on top. 11. Return the bread to the oven for 5 minutes. 12. Remove the bread from oven and serve. 13. Enjoy!
Handle It With Wet Hands
Wet hands are very important when handling any type of dough. This is because wet hands help prevent sticking and tearing of the dough. To ensure that your hands are not too dry, you can always rub them with a towel. However, if you feel that your hands are still too dry, you can apply some moisturizer to your hands.
Lightly Flour One Side Of The Dough During Shaping
To avoid the dough from sticking to the surface of the pan, lightly flour one side of the dough during shaping.
Start With A Lower Hydration
If you’re using bread flour, you’ll probably need to lower the hydration slightly. I usually go down to about 65% for a 100g loaf. This is because bread flour absorbs moisture very quickly, so if you use too much, you’ll end up with a dense loaf.
In conclusion, the cookies will spread out during baking if you first chill the dough, and you must use a high quality, low-protein flour. The baking powder will help the cookies to spread out. Finally, the longer the cookies bake, the thinner they will be as the structure of the cookies becomes more stable as they cool.

It's knowing what you're doing and having a good basic foundation.
That's why my mission is to teach you the fundamentals of great cooking...
So you can start creating delicious dishes without any rules or restrictions whatsoever.
With my step-by-step instructions, my unique insider secrets and techniques,
You'll be able to easily take ordinary food and make it extraordinary!
- How to Prolong the Life of Your Kitchen Appliances - December 22, 2024
- How Long does Yogurt Take to Freeze - May 5, 2023
- Top 10 best restaurants in Montana - May 1, 2023