Last Updated on November 8, 2022
Are you looking for ways to speed up the time needed to remove ice? If yes, then follow these instructions to remove an ice maker from a refrigerator.
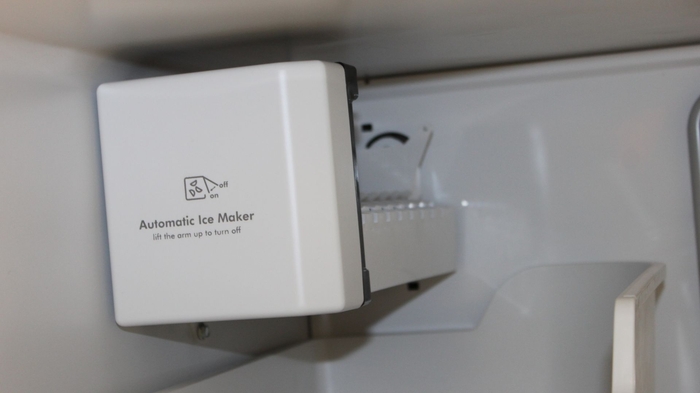
An ice maker is a cooling device installed inside a refrigerator or freezer. The ice machine comes with a removable panel underneath where you can see the system components. These devices produce frozen water, thus creating ice cubes.
You can manually dismantle the entire ice maker assembly using screwdrivers and other tools. This method is quick and effective. However, it requires plenty of space for you to access the fridge area. In addition, you’ll also have to take care of broken parts and debris that might get stuck under the ice cube tray.
Detailed Guide on how to remove an ice maker from a GE Refrigerator
GE refrigerators are known for being reliable and energy-efficient appliances in consumer homes. However, sometimes these powerful home appliances aren’t relatively so straightforward to remove and replace.
In fact, removing an ice maker from a GE refrigerator is probably something you’ll only ever have to do when replacing a broken component rather than during routine maintenance. So here’s everything you need to know to make sure you can remove the ice maker yourself.
Remove the back panel of the fridge door. There should be four silver tabs on the left and right sides of the door. Pry these away from the frame and lift them upwards. Once lifted, remove the front panel of the fridge. Lifting the front panel is very similar to lifting the back panel. It should pop out easily.
Lift the bottom shelf from its brackets and pull it towards you. Lift the top shelf and pull it towards you. Do this carefully so that you avoid damaging the glass shelves.
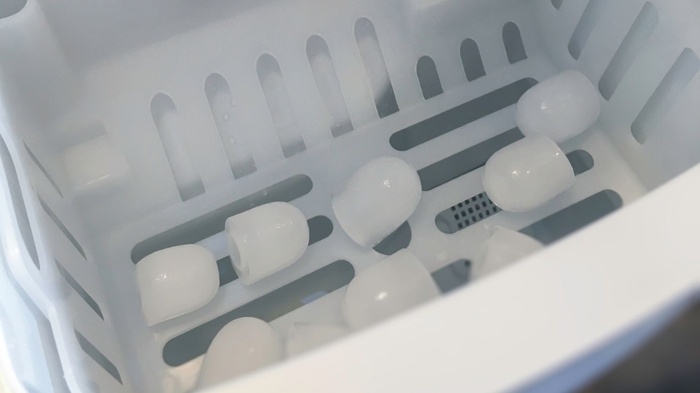
Pry open the side panels of the fridge. Again, be careful not to damage anything inside. Now remove the entire ice tray assembly. Use a Phillips head screwdriver to pry the plastic clips holding the ice bin together. Pull the ice cubes gently away from the unit. Unscrew the small screws fastening the plastic supports around the ice cube drawer. Carefully loosen the bolts securing the ice bin to the fridge case. Slide the ice bin forwards and backward to disengage the clip. Now slide the ice cube drawer out. Repeat the process for the upper ice bin. Finally, unscrew all three nuts connecting the back wall of the freezer compartment to the cabinet floor. With the front and rear walls detached, you can now lift up the rest of the freezer compartment.
With both compartments removed, you can remove the ice machine from the fridge body. To do this, first, remove the two metal handles attached to the rear of the ice machine. These will come loose as soon as you detach the power cable plugging the machine into the fridge. Gently push the ice machine forward until you hear a click. Don’t force it. Instead, give the handle a little tug downwards and release the connection. Remove the mounting bracket and wire connector from the rear of the refrigerator.
Now it’s just a matter of taking apart the ice maker itself. Be gentle! Push the plastic ice bucket outwards. Lift the plastic cover on the base plate of the ice maker. Gently pull the arm levers towards you and remove the arms. Take care not to pull the plastic arms too far. They’re held onto the base plate by rubber bands. Release the ends of the rubber bands, allowing the arms and plate to separate.
Replace the rubber bands with new ones. Screw the arm plates back over the holes in the base plate, then tighten the screws again. Replace the plastic cover on the ice maker. Reattach the wires from the power cord to the new connectors on the ice maker, ensuring that the red lead goes to the negative terminal and the black lead to the ground terminal.
Finally, reassemble the fridge and place the ice trays back in position. Secure the ice maker with the clips, then reconnect the power cable. All that remains to complete the job is to clean up any crumbs and dirt from the removal process.
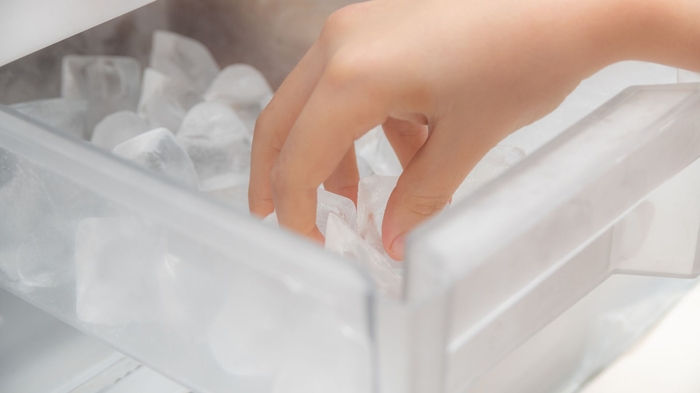
How to Remove Ice Cubes from a GE Ice Maker
To remove ice cubes from a GE refrigerator/freezer, pour a little warm tap water into the mold. Let it stand for about five minutes. Then, use a spoon to scoop out the ice cubes. You don’t want to put the ice cube tray back in the freezer because you’ll end up with melted ice again.
Pour some vinegar into the mold to loosen the ice cubes. This will prevent them from sticking together. Don’t let the ice cubes rest in the mold too long, or they’ll start melting.
Conclusion
If your refrigerator has an ice maker, then it’s time to remove the unit and take it outside while it’s still connected to power. Once removed all you need to do once removed is cut off the wires connecting the machine to the unit. Then, let the freezer sit out overnight with no electricity running into it. The following day, plug in your new appliance and wait until it makes ice again. When you’re ready to install the machine back in, simply reverse the above steps and reconnect the wires. Hope this guide might help you successfully remove the ice maker unit and replace it with a new one.
GE refrigerators come with ice makers built into them, but sometimes they don’t work properly or break down.
If yours has stopped working, you’ll want to remove it before calling a repairman.
This guide explains you how to get rid of the ice maker without damaging anything else inside the refrigerator.
GE makes some of the most reliable appliances around, but their refrigerators aren’t immune to problems.
They’ve had issues with their ice machines breaking down, leaving consumers stuck with no way to cool food.
This quick guide explains you how to remove an ice maker from a GE refrigerator
How to Remove an Ice Maker from a GE Refrigerator
GE refrigerator ice makers are designed to be removed easily. However, if you cannot remove the ice maker from the refrigerator, you can still use the refrigerator. To remove the ice maker from a GE refrigerator, follow these steps: 1 Open the door of the refrigerator. 2 Unplug the power cord from the back of the refrigerator. 3 Lift the ice maker off the bottom shelf. 4 Pull the ice maker away from the wall of the refrigerator. 5 Disconnect the wires connected to the ice maker. 6 Remove the ice maker from the freezer compartment. 7 Place the ice maker into a plastic bag. 8 Close the refrigerator door. 9 Plug the power cord back into the back of the refrigerator and turn the power switch on. 10 Put the ice maker back into the freezer compartment. 11 Replace the ice maker onto the bottom shelf. 12 Close the refrigerator door and plug the power cord back into its original outlet. 13 Turn the power switch on again. 14 Enjoy!
For Bottom Freezer Models
To remove the ice maker from your bottom freezer model, follow these steps: Step 1: Open the door of the freezer. Step 2: Unplug the power cord. Step 3: Lift the ice maker off of the bottom shelf. Step 4: Pull the ice maker away form the wall of the freezer. Step 5: Disconnect the wires connected the ice maker. Step 6: Remove the ice maker from freezer compartment. Step 7: Place the ice maker into plastic bag. Step 8: Close the freezer door. Step 9: Plug the power cord back to the back of the freezer and turn the power switch. Step 10: Put the ice maker back in the freezer compartment. Step 11: Close the freezer door and plug the power cable back into its original outlet and turn the power switch back on. Step 12: Enjoy!
For French-door Models
To remove the ice maker from a french-door model, follow these steps. Step 1: Open the freezer door. Step 2: Unhook the wire connector from the ice maker. Step 3: Remove the ice maker. Step 4: Place the ice maker in a plastic bag. Step 5: Close the freezer door, and plug the power cord back into its original outlet. Step 6: Turn the power switch back on and enjoy!
How to Remove Ice Cubes from a GE Ice Maker
To remove the ice cubes from a GE ice maker, follow these steps.Step 1: Open the freezer drawer. Step 2: Pull the ice cube tray out of the freezer drawer. Step 3: Remove any remaining ice cubes from the tray. Step 4: Put the ice cube tray back in the freezer drawer. Step 5: Close and lock the freezer drawer. Step 6: Plug the power cord back into the wall socket. Step 7: Turn the power switch on and enjoy!
How do you remove a GE ice tray?
Ice drawers are very useful appliances if you have a refrigerator with a built-in freezer. These drawers are used to store frozen items such as ice cubes, ice cream, and other frozen treats. Ice drawers are usually located under the freezer door. To remove the ice drawer, simply lift the drawer out of the freezer and slide it into a storage area where it won’t get damaged.
How do you remove Ge bottom freezer ice maker?
To remove the ice maker from your refrigerator, you will need to remove the back panel of the unit. Once you have removed the back panel, you will see two screws holding the ice maker into place. Remove these screws and lift the ice maker off of the refrigerator.
How do you remove the ice maker on a GE side by side refrigerator?
Frigidaire Freezer Drawers are easy to open if you know how to do it. To open the freezer drawers, you need to press down on the handle located on the back of the freezer. This will release the drawer from the cabinet. Once the drawer is released, you can pull it out easily.
How do you remove an ice bin?
Ice bins are usually installed under the sink and are used to store ice cubes. To remove the ice bin from the wall, unscrew the screws holding the base plate to the wall. Then lift off the base plate and pull the ice bin away from the wall.
How do you remove a Frigidaire freezer drawer?
If you have a GE side by side fridge freezer model number GSSD0A1BK3E2F1G1H1J1K1L1M1N1P1Q1R1S1T1U1V1W1X1Y1Z1AA, you can remove the ice maker from the bottom of the unit using a Phillips screwdriver. Remove the screws holding the ice maker assembly in place. Then lift the ice maker assembly off the base.
How do I take the ice maker out of my GE refrigerator?
If you have a GE refrigerator model number BHG5A3BK0F1, you can easily remove the ice maker from the fridge using the following steps: 1 Remove the back panel 2 Unscrew the screws holding the ice maker 3 Lift the ice maker away from the fridge 4 Disconnect the wires 5 Remove the ice maker 6 Clean the ice maker 7 Reinstall the ice maker 8 Replace the back panel 9 Screw the screws into place 10 Refrigerate the fridge 11 Enjoy!
How do you remove an ice drawer from a freezer?
If you have a GE refrigerator freezer, you can easily remove the ice tray from the freezer using the following steps: 1 Remove the door panel 2 Lift the front panel 3 Pull the ice tray out 4 Replace the door panel 5 Close the door panel 6 Reinstall the front panel 7 Put the door panel back on 8 Refrigerate the unit 9 Enjoy!

It's knowing what you're doing and having a good basic foundation.
That's why my mission is to teach you the fundamentals of great cooking...
So you can start creating delicious dishes without any rules or restrictions whatsoever.
With my step-by-step instructions, my unique insider secrets and techniques,
You'll be able to easily take ordinary food and make it extraordinary!
- How to Prolong the Life of Your Kitchen Appliances - December 22, 2024
- How Long does Yogurt Take to Freeze - May 5, 2023
- Top 10 best restaurants in Montana - May 1, 2023