Last Updated on November 8, 2022
You probably already have a fridge at home, but did you ever wonder why they call them refrigerators? What exactly does a refrigerator do?
A refrigerator is designed to store food safely at low temperatures. They come in various sizes and prices, depending on their capacity. Refrigerators are also called freezers or coolers. The term refrigerator comes from the Latin word frigidus meaning cold.
Refrigerators are essential appliances in every household. If you want to get the most out of your refrigerator, then read our guide below.
Have you ever bought a refrigerator from Midea and found out later that it leaks water? If yes, then you might want to read this article because I’m going to tell you exactly how to fix this problem.
The Midea brand has been around since 1949. They are a global company that produces household appliances such as refrigerators, washing machines, air conditioners, etc. Their products are sold in over 100 countries worldwide.
It seems like every time you turn around, someone is talking about leaking refrigerators. In fact, the number of complaints regarding these appliances has increased dramatically in recent years. According to Consumer Reports, the average cost of repairing a leaky refrigerator is $1,400.
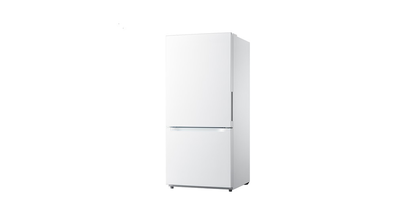
Midea Refrigerator Leaking [How to Fix]?
If you own a Midea refrigerator, then you should know that there’s a good chance that it will leak. This is especially true if you live in an area with high humidity levels.

You can find out whether your refrigerator is leaking by looking for condensation inside the door. It looks like tiny droplets of water. If you see any signs of leakage, then you need to take action immediately.
You can try to repair the appliance yourself, but it may be too difficult. Instead, you should contact a professional who specializes in fixing leaking refrigerators.
There are many different reasons why your refrigerator could be leaking. Some common causes include:
– A faulty compressor
– A cracked evaporator coil
– An improperly installed drain pan
– A damaged gasket
– A broken seal
How do I stop my refrigerator from leaking?
First, make sure that your refrigerator is plugged into a working electrical outlet. Next, check the temperature settings. If the temperature is set too high, then the compressor will run constantly.
This will cause the compressor to wear down faster. Also, the compressor will not last as long as it should.
Next, look at the seals. Make sure that all of the seals are properly attached. If one of the seals is loose, then it could allow moisture to enter the unit.
Also, make sure that the drain pan is securely fastened to the bottom of the refrigerator. If it isn’t, then water could collect in the bottom of the refrigerator and eventually seep through the floor.
Finally, make sure that the refrigerator is level. If it is tilted, then it won’t operate correctly.
Why is my fridge leaking water onto the floor?
When you first buy a new refrigerator, it comes with a warranty. However, after a few months or even weeks, the warranty expires.
At this point, you’ll have to pay for repairs. The reason why your refrigerator is leaking is probably due to a defective part.
Unfortunately, it’s impossible to determine which part is causing the problem without opening up the refrigerator. You could also damage other parts when you open it up.
Instead, you should call a professional who specializes in repairing leaking refrigerators. He or she will be able to tell you what needs to be repaired.
What does it mean if my refrigerator smells bad?
The smell of rotten food is usually caused by mold. Mold grows on moist surfaces. For example, if you leave a wet towel next to your refrigerator, then it will grow mold.
The best way to prevent mold from growing is to keep your refrigerator clean. When you wash dishes, wipe off excess water. Don’t let water sit near the refrigerator.
Also, don’t use plastic bags to store leftovers. They trap odors and bacteria. Use paper instead.
Another thing you can do is to remove the shelves from your refrigerator. This will give you more room to store items.
If the odor persists, then you should call a professional. He or she will inspect the interior of your refrigerator and identify the source of the problem.
Can I fix my own leaky refrigerator?
Yes, you can fix your own leaky refrigerator. But it will require some time and effort.
First, turn off the power to the refrigerator. Then, disconnect the wires from the back panel. Finally, take out the old gaskets and put them away.
After that, replace the old gaskets with new ones. Then, reattach the wires to the back panel.
Once everything is connected, plug the refrigerator back into an electrical socket. Turn the power back on and see how well it works.
If the repair didn’t work, then you’ll need to contact a professional.
Is there anything else I can do to stop my refrigerator from leaking?
Yes, there are several things you can do to help prevent leaks. One of the most important things you can do is to maintain the proper humidity levels inside your home.
For example, if you live in a dry climate, then you should add humidifiers to your home. These devices produce moisture.
You can also install dehumidifiers in your home. Dehumidifiers suck air containing moisture outside of your house.
In addition, you should check the seals around doors and windows. Make sure they’re tight. If they aren’t, then you should get new seals.
Are there any signs that my refrigerator is about to break down?
There are many signs that your refrigerator might be about to break down. Some of these include:
• Your refrigerator doesn’t cool as much as it used to.
• It takes longer to defrost than before.
• There’s no ice making capacity.
• The compressor makes loud noises.
• The door won’t close properly.
If you notice any of these problems, then you should call for repairs right away.
Have you ever had a refrigerator leak water or food inside your house?
If yes, then you might want to check out this article.
Midea has come up with a solution to fix the problem.
Midea is a global company that manufactures household appliances.
The company has recently launched its new fridge model called the Midea EZF3S1.
This fridge comes with a new feature where the door automatically opens when the temperature reaches 0 degrees Celsius.
This is a great idea because it saves energy and prevents the leakage of cold air into the kitchen.
However, the automatic opening mechanism does not seem to work properly
Midea Fridge Leaking Water – Why and Solutions
Refrigerators are very important appliances for every household. It keeps our food safe from spoiling and helps us to store food items properly. But sometimes we face problems while using refrigerator. We can fix these issues easily. Here I am sharing the solution of midea fridge leaking water problem. First check if the door is open or closed properly. If the door is not closed properly then it could be the main issue. So, please try to close the door properly. If the door is closed properly but still facing leakage problem then check the temperature of the freezer. If the temperature is low then it could be the problem. Please turn off the power supply of the refrigerator and wait for 10 minutes. After 10 minutes turn on the power again. Now check whether the door is opening or closing properly. If the problem persists then contact the service center.
1. Level the Refrigerator
Check the level of the liquid in the bottom of the refrigerator. If the liquid is full then the compressor is working fine. If the liquid is empty then the compressor is not working. 2. Check the Compressor Answer: Open the back panel of the refrigerator and check the compressor. If the compressor is damaged then replace it.
How to Level a Midea Refrigerator
Remove the ice maker from the freezer compartment. Remove the door liner from the freezer compartment. Lift the front panel of the refrigerator and remove the screws holding the panel to the cabinet. Remove the panel. Remove the two screws holding the top panel to the cabinet. Slide the panel forward until it stops. Remove the three screws holding the panel to each side of the cabinet. Slide the rear panel away from the cabinet. Remove the four screws holding the panel to either side of the cabinet. Lift the panel and slide it forward until it stops. Replace the panel. Replace the screws. 3. Clean the Ice Maker Clean the ice maker. Use a soft brush and warm water. Rinse well. Dry thoroughly.
Step 1:
To level a midea refrigerator, start by removing the ice maker. This is done by lifting off the back panel of the freezer compartment. Next, remove the door liner. Then lift off the front panel of the fridge. Finally, remove the screws holding the bottom panel to the cabinet. Now, slide the panel forward until it comes to a stop. Once the panel is removed, you can see the back wall of the freezer compartment. Remove any debris that could get stuck between the walls. After cleaning, dry the unit thoroughly. 4. Reinstall the Door Liner Replace the door liner. Start by placing the door liner into position. Make sure the liner fits snugly against the sides of the freezer compartment. Then, place the liner into the freezer compartment. Press down firmly to ensure the liner stays in place. Screw the liner into place using the screws provided.
2. Clean the Freezer Drain
First, turn off the power supply to the refrigerator. Then, open the refrigerator door. Turn the compressor switch to the “off” position. Open the drain pan located under the refrigerator. Using a sponge brush, clean the drain pan. Rinse the drain pan with warm water. Dry the drain pan with paper towels. Close the drain pan. 1. Replace the Ice Maker Remove the ice maker from the refrigerator. Place the ice maker onto a flat surface. Remove the ice tray and the ice bin. Remove the ice maker cover. Disconnect the wires connected to the motor. Remove the screws securing the ice maker to the refrigerator. Lift the ice maker away from the refrigerator. Slide the ice maker into the refrigerator. Reconnect the wires to the motor. Secure the ice maker to the floor of the refrigerator using the screws provided. Install the ice maker cover.
4. Check the Water Filter Housing
5. Check the Drain Line 6. Check the Drain Valve
5. Replace the Drip Pan
1. Remove the filter from the top of the unit. 2. Clean the filter screen using soap and warm water. 3. Rinse the filter screen thoroughly with clean water. 4. Place the filter back into the unit. 5. Turn off the power switch. 6. Open the drain valve located on the bottom of the unit. 7. Close the drain valve. 8. Wait until the water stops draining. 9. Reinstall the drain pan. 10. Turn on the power switch. 11. Close the drain valve and turn off the power switch. 12. Wait until the water drains completely. 13. Check the water level in the reservoir. 14. Replace the drip pan if necessary. 15. Test the water flow. 16. Replace the filter if necessary. 17. Check the overflow tube for leaks. 18. Replace the overflow tube if necessary. 19. Check the air vent cap for leaks. 20. Replace the air vent cap if necessary. 21. Check the drain
6. Check the Water Tank
Checking the water tank is very important because if the water level drops below the minimum required level, the rice cooker won’t function properly. To check the water level, open the lid and remove the inner pot from the outer pot. Then, turn off the power switch and wait until the indicator light turns off. This indicates that the water level is sufficient. If not, you’ll need to refill the water tank.
7. Flush the Water System
Flushing the water system is done to ensure that the rice cooker works properly. To flush the water system, follow these steps: 1 Remove the inner pot from the rice cooker 2 Turn off the power switch 3 Wait until the indicator light turns red 4 Open the lid 5 Press the button to release the air trapped inside the inner pot 6 Close the lid 7 Wait until the indicator lights turns green 8 Replace the inner pot back into the rice cooker 9 Reattach the power cord 10 Turn on the power switch 11 Wait for the indicator light to turn off 12 Repeat Steps 1 – 11 until the indicator light turns green 13 Put the rice cooker away 14 Clean the rice cooker 15 Store the rice cooker 16 Enjoy your new rice cooker!
8. Check the Water Inlet Valve
To check the water inlet valve, follow these steps: 1 Remove the inner pot from rice cooker 2 Turn off power switch 3 Open the lid 4 Press the button to release air trapped inside the innerpot 5 Close the lid 6 Wait until the indicator light turned green 7 Replace the inner pot back to rice cooker 8 Turn on the power switch 9 Wait for the indicator light turned off 10 Repeat Steps 1 – 8 until the indicator light turned off 11 Put the rice cooker away 12 Clean the rice cooker 13 Store the rice cooker 14 Enjoy your new rice cooker 9. Cleaning the Rice Cooker
How to Replace a Refrigerator Water Inlet Valve
To clean the refrigerator water inlet valve, remove the outer shell of the refrigerator and turn off the compressor. Then, open the door of the refrigerator and remove the water inlet valve. After removing the water inlet valve from the refrigerator, wash it thoroughly using warm water and soap. Rinse the water inlet valve well after washing. Dry the water inlet valve completely with a towel. Replace the water inlet valve into the refrigerator. 10. How to Install a Microwave Oven Door Handle To install a microwave oven door handle, follow these steps: 1 Remove the old door handle 2 Cut the old door handle 3 Screw the new door handle onto the door frame 4 Reinstall the door handle 5 Enjoy your new microwave oven door handle

It's knowing what you're doing and having a good basic foundation.
That's why my mission is to teach you the fundamentals of great cooking...
So you can start creating delicious dishes without any rules or restrictions whatsoever.
With my step-by-step instructions, my unique insider secrets and techniques,
You'll be able to easily take ordinary food and make it extraordinary!
- How to Prolong the Life of Your Kitchen Appliances - December 22, 2024
- How Long does Yogurt Take to Freeze - May 5, 2023
- Top 10 best restaurants in Montana - May 1, 2023