Last Updated on May 13, 2022
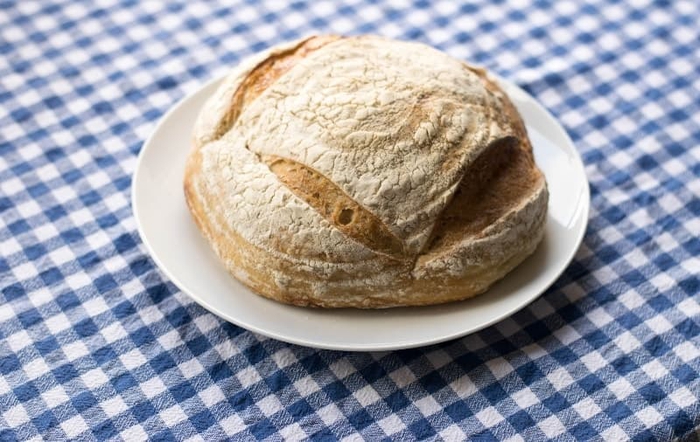
Sourdough bread has become very trendy lately. Everyone seems to love its unique taste and texture. If you want to try your hand at baking sourdough, then you should definitely give it a go. The only problem is that some people don’t get the hang of it. They might even fail miserably.
Sourdough is a type of yeast-leavened dough that requires time and patience to bake. It’s also known as levain because it gets its distinctive flavor from the fermentation of flour and water. In other words, it takes time to develop the desired flavor.
There are several reasons why you may not be able to achieve the perfect shape for your sourdough loaf. Some common issues include too much or too little water, mixing the ingredients properly, and using the correct amount of starter.
How To Help Your Sourdough Keep Its Shape?
The first thing you need to do when making sourdough bread is to make sure you have enough water in the recipe.
This will help keep the dough moist while it rises. You can use either warm or cold water depending on what kind of dough you are working with. Warm water gives off more steam than cold water.
If you want to know how much water to add to your sourdough recipes, here are some guidelines:
• For regular bread dough, use about 1 cup (240 ml) of water per 2 cups (480 ml) of flour.
• For pizza dough, use about 3/4 cup (180 ml) of water per 4 cups (960 ml) of flour. This helps create a softer crust.
• For sandwich bread, use about 1/2 cup (120 ml) of water per 3 cups (720 ml) of flour. Use less water if you want a firmer crust.
Why Won’t My Sourdough Hold Its Shape?
Sourdough bread has been around since the beginning of time. It’s one of those foods that people love because it tastes amazing and it’s healthy too. However, there are times when sourdough bread doesn’t hold its shape.
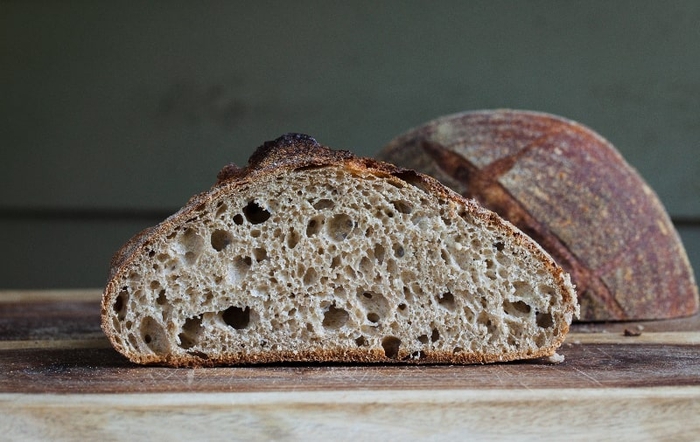
For a variety of reasons, sourdough does not retain its form. It might be due to a lack of surface tension, excessive hydration, or a lack of gluten structure. It’s tough to pinpoint exactly what’s causing the problem, but it’s critical for future births to be better.
If you’re having trouble with your sourdough bread holding its shape, then you might want to try these tips.
Here are the six most common reasons for your sourdough to flatten after proving.
You’re Not Using A Suitable Flour
The first thing you need to know about making good sourdough bread is that you have to use a specific type of flour mix. You don’t just throw any old flour into your recipe; otherwise, you won’t end up with anything close to authentic sourdough flavor.
There are two types of flours used in sourdough recipes: whole-grain and white. Whole grain contains more nutrients than refined grains like wheat flour. This means that they contain higher levels of protein, fiber, vitamins, minerals, antioxidants, and other beneficial compounds. They also tend to taste much better than their refined counterparts.
Whole grain flours include rye, spelled, barley, oats, buckwheat, millet, cornmeal, sorghum, teff, amaranth, quinoa, Kamut, etc. These flours all provide different flavors and textures depending on how long they’ve been milled. For example, some will give off a nutty aroma while others may smell sweet. Some will feel soft and chewy while others will be firm and crunchy.
White flour is made from ground wheat berries. White flour provides less nutrition than whole-grain flour, so it tends to make baked goods dense and heavy. In addition, it lacks many of the health benefits associated with whole grain flour. Because some flour absorbs more water than others, the amount of moisture in the dough might vary.
Wholewheat flour, for example, absorbs more water than all-purpose flour, resulting in a dough that is drier and less sticky. When choosing which kind of flour to use, consider whether you prefer lighter loaves or denser ones. The best choice depends on personal preference as well as the texture desired by the baker.
The Gluten Wasn’t Developed Enough
Gluten is an elastic protein found naturally in wheat. It gives bread dough strength and helps create air pockets within the loaf. If you haven’t developed enough gluten during the fermentation process, then your bread could fall apart easily.
To develop gluten, you must allow your starter to ferment at room temperature for several days before adding yeast. During this period, the enzymes present in the starter break down proteins called gliadins. As the mixture ferments, the gliadin molecules bond together forming strong bonds between the individual strands of gluten. Once formed, the gluten can no longer absorb liquid, allowing the dough to rise properly.
You Didn’t Proof It In A Banneton
Proofing refers to baking bread without using a banneton. Instead, proofers bake directly onto pans. While this method produces perfectly acceptable bread, it doesn’t produce the same crust as when using a banneton.
Bread makers typically come equipped with a metal pan liner that fits inside the machine’s bowl. Using this liner prevents excess steam from escaping through holes in the bottom of the pan. Without a liner, steam escapes into the oven where it condenses against hot surfaces causing uneven browning.
If you don’t have access to a banneton, try placing a piece of parchment paper over the top of the bread after removing it from the proofer. Alternatively, place the bread in a large mixing bowl covered with plastic wrap. Allow the bread to rest until cooled completely before slicing.
It Was Overproofed
Overproofing occurs when the yeast has been allowed to multiply beyond its normal growth rate. Yeast cells divide rapidly, doubling their size every 20 minutes.
After about four hours, however, the cell walls begin to thicken, preventing further division. At this point, the yeast stops growing but continues dividing. Eventually, the yeast dies off leaving behind dead cells known as leaven. The result is under-fermented or "underdeveloped" bread.
The solution to over-proofing is simple — remove the bread from the proofer early! Bread should be removed from the proofer once the internal temperature reaches 180 degrees Fahrenheit. You’ll know the bread is ready by gently pressing on the center of the loaf. When pressed, the bread will feel firm yet springy.
It Wasn’t Shaped Correctly
Shaping refers to how the dough is shaped prior to being placed in the oven. There are two basic methods: straightening and folding. Straighten means flattening the dough so that it lies flatter on the countertop. Fold means rolling up the dough like a jelly roll.
In general, most recipes call for either straightening or folding. If you’ve ever made pizza dough, then you already understand what I’m talking about. Pizza dough needs to be stretched thin enough to fit between the ridges of your pie tin. It also requires some degree of elasticity to allow the dough to expand during cooking.
In order to achieve both qualities, we use one of three techniques: straightening, folding, or pinching. Each technique offers unique benefits depending upon which type of bread recipe you’re making. For example, straightening works well for sandwich loaves since it helps create an open crumb structure. On the flip side, folding produces more dense crusts. Pinching can produce a variety of results depending upon whether you pinch the entire loaf at once or only partway through the process.
Have you ever tried making sourdough bread?
If you have, then you know how frustrating it can be.
Sourdough bread is a type of leavened bread that has been around since ancient times.
In fact, sourdough bread was first recorded in China during the Han Dynasty 206 BC – 220 AD.
If you want to master sourdough baking, then read this blog post!
How To Help Your Sourdough Keep Its Shape
If you’re having difficulty keeping your sourdough bread dough from spreading out during proofing, here are a couple tips to help you get it back into shape. 1. Use a bench scraper to gently lift the edges of the dough off the surface of the bowl. This will prevent the dough from sticking to the sides of the bowl. 2. Gently fold the dough over itself several times, using a bench scraper to loosen any sticky spots.
Use A Banneton
Bannetons are great tools for shaping loaves of bread. They are usually used for making baguettes and other long loaves of bread. A banneton is basically a rectangular piece of cloth that is folded over and tied at the ends to form a square box. It is placed on top of the loaf of bread while it is rising. The banneton keeps the bread from expanding and allows air to circulate around the bread.
Build Surface Tension
Surface tension is a force that acts between two surfaces. For instance, if we take a glass of water and pour it into another glass of water, the surface tension of the water creates a bond between the two glasses. This prevents the water from spilling over the edge of the glass. Surface tension is created by molecules sticking together at the interface of two different liquids. In order to break surface tension, you need to either remove the molecules that stick together or separate the two liquids.
Proof It Right
1 A liquid is said to be incompressible if it does not change shape when subjected to external forces. Water is an example of an incompressible liquid because it maintains its volume even though it is compressed. 2 A liquid is said be compressible if it changes shape when subjected to external pressures. Air is an example of a compressible liquid because it expands when pressurized.
Proof It In The Fridge And Bake Straight Away
A liquid is said to be compressible if it takes up less space when it is under pressure. This is why air is a compressible liquid. A liquid is said to maintain its volume when it is under pressure if it doesn’t take up any less space. This is why water is an incompressible liquid.
Develop Enough Gluten
Gluten is a protein found in wheat, barley, rye, and oats. Gluten helps breads and pastas hold together. Gluten is used in many products such as crackers, cookies, pizza crust, and pretzels. How To Make Your Own Bread Crumbs
Reconsider The Hydration Level
Bread crumbs are a great way to get rid of stale bread. It is very easy to make homemade breadcrumbs. Just take a piece of bread and cut into cubes. Then put it in a bowl and pour enough milk to soak the bread completely. Let it sit overnight. In the morning, drain off the milk and rinse the bread under running water. Put the bread back in the bowl and repeat the process until the bread becomes dry. Now you can store the breadcrumbs in airtight containers.
Use Some Whole Wheat Or Rye Flour
If you want to make healthy breadcrumbs, try using whole wheat flour instead of white flour. This type of flour contains more fiber and nutrients. Also, if you are looking for healthier breadcrumbs, you can replace half of the white flour with whole wheat flour.
Why does my sourdough bread lose its shape?
To prevent bread from getting dry, you can place it in a slow cooker. Bread cooked in a slow cooker retains moisture better than bread cooked in the oven. It keeps the bread soft and moist.
Why does my sourdough bread fall when baking?
Breads that are baked in the oven tend to get hard because of the high temperatures. This happens when the starch molecules in the bread expand and contract rapidly. As a result, the bread gets tough and loses its softness. To avoid this problem, you can bake breads in a slow cooker instead of the oven.
How do you keep bread in shape?
To make your sourdough shaping better, you can try these methods: 1 Mix the flour and salt together in a large mixing bowl. 2 Add the yeast mixture to the flour mixture. 3 Make sure the ingredients are well mixed. 4 Add the water slowly while stirring vigorously. 5 Knead the dough for about 10 minutes. 6 Put the dough in a lightly oiled bowl and cover with plastic wrap. 7 Let the dough rise for about 90 minutes. 8 Punch the dough down and knead again. 9 Shape the dough into a ball and put it back in the bowl. 10 Cover the bowl with plastic wrap and let it rise for about 45 minutes. 11 Punch the dough down again and divide it into two pieces. 12 Roll each piece into a long rope and cut it into equal sized pieces. 13 Place the pieces on a baking sheet lined with parchment paper. 14 Cover the baking sheet with plastic wrap and let the loaves rise for 30 minutes. 15 Preheat the oven to 450 degrees F 230 C. 16 Bake the
How do I stop my sourdough from spreading?
1 To prevent your bread from spreading, place the dough in a greased bowl. Cover the bowl tightly with plastic wrap and let sit overnight. In the morning, remove the plastic wrap and gently press down on the surface of the dough. Let rest for another hour. Repeat this process every 12 hours until the bread is ready. 2 To stop your bread from spreading, roll it into a log shape and cut it into slices. Then, brush each slice with olive oil.
How can I make my sourdough shaping better?
Sourdough breads are usually baked in a loaf pan. This creates a domed top, which prevents the bread from collapsing while baking. Sourdough breads are traditionally baked in a wood-fired oven, but if you bake them in a regular oven, you can still achieve a good result. Place the bread seam side down on the bottom rack of the oven. Bake at 350°F 180°C for 30 minutes, then turn the bread over and continue baking until done. How long does it take to make sourdough bread?
How do you tighten sourdough bread?
When making sourdough bread, the dough needs to be rested for several hours. During this resting period, the yeast cells multiply and produce carbon dioxide gas. As the dough rests, the CO2 bubbles expand and push against each other, creating pockets of air within the dough. These pockets of air create holes in the bread. When baking, the bread expands and pushes against the sides of the pan, causing the bread to collapse. To prevent this, place the bread seam side down in the pan.
Why does my bread not hold its shape?
Sourdough breads are very easy to make but difficult to bake. This is because the dough needs to be mixed well and allowed to rest for several hours. If the dough is not kneaded enough, the gluten strands will not develop properly and the bread will turn out tough. Also, if the dough is not left long enough to ferment, the yeast will die off and the bread will fail to rise. To ensure that the bread turns out soft and fluffy, you need to follow these steps: 1 Mix the ingredients thoroughly 2 Let the dough rest for about 3 hours 3 Knead the dough 4 Shape into loaves 5 Place in a greased loaf pan 6 Cover with plastic wrap 7 Leave the dough to rise until doubled 8 Bake at 350 degrees F for 30 minutes 9 Remove from oven 10 Cool completely 11 Slice 12 Enjoy!
In conclusion, there are a number of reasons that your sourdough might not hold its shape and it can be difficult to diagnose why this is happening. The best bet is to try and troubleshoot as best as possible and see what works for you as a baker. There is no one solution as every sourdough is as unique as the baker who bakes it.

It's knowing what you're doing and having a good basic foundation.
That's why my mission is to teach you the fundamentals of great cooking...
So you can start creating delicious dishes without any rules or restrictions whatsoever.
With my step-by-step instructions, my unique insider secrets and techniques,
You'll be able to easily take ordinary food and make it extraordinary!
- How to Prolong the Life of Your Kitchen Appliances - December 22, 2024
- How Long does Yogurt Take to Freeze - May 5, 2023
- Top 10 best restaurants in Montana - May 1, 2023