Last Updated on November 8, 2022
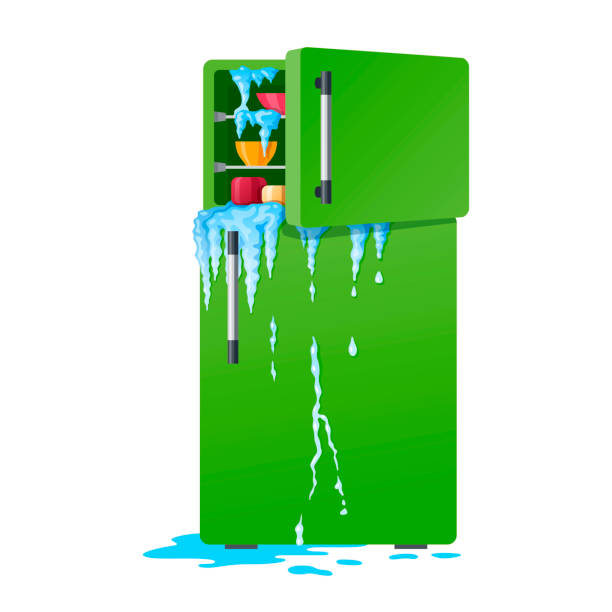
A leaky Kenmore refrigerator could mean a lot of things. If you’re having trouble figuring out what the problem might be, we’ve got some ideas about possible causes and fixes.
The most common reason for a leaking fridge is a broken element inside the unit, such as a faulty compressor, evaporator coil, or ice maker. A cracked seal around the door could also lead to leaks, especially if it’s been exposed to moisture.
Check the drain pan under the sink if you suspect a leak is coming from outside the fridge. There should be a rubber hose leading into the sewer system. If there isn’t one, look for another way to drain water from the area. You can use a bucket underneath the
How to sink or install a garbage disposal drain pipe?
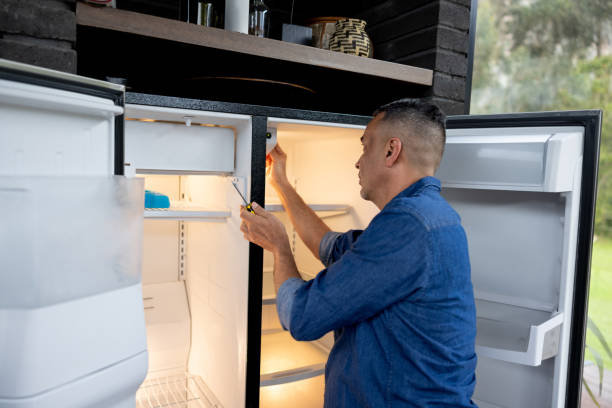
Fixing a leaking refrigerator is relatively simple, though it does require some tools. Disconnect the hoses and electrical wires. Next, open up the cabinet doors and pull everything out. Once you’ve removed all the parts, take a good look at them. Is anything loose or broken? If something seems amiss, replace it immediately.
Once you’ve replaced obviously defective items, check for signs of corrosion. This can happen over time due to air, salt, and chlorine exposure. Look for rust spots on metal parts, as well as discoloration on plastic components like seals and gaskets.
To keep your fridge running smoothly, clean the coils regularly. Use a damp cloth to wipe away dust and debris, and give the coils a thorough cleaning once every six months. Don’t forget to change the filter periodically, too.
How Does Refrigeration Work?
Refrigerators work because there is a process called evaporation. When water evaporates, it takes heat away from the surrounding air. This causes the temperature around us to drop. If we don’t use our refrigerator, the food inside begins to freeze. As soon as the freezer reaches 0 degrees Fahrenheit, condensation occurs. This is when the liquid turns into gas. The gas expands and pushes against the walls of the container.
The accumulation phase is where the coldest part of the system is located. Once the pressure builds up enough, the vapor is forced out of the compressor. This is why you hear a hissing sound whenever you open the door.
Defrosting is essential to avoid having frozen foods. To defrost the system, the compressor must run continuously. During this time, the compressor pulls warm air from the outside into the fridge’s interior.
Water leaks into the compressor could lead to severe problems. A leaky compressor could overheat and burn itself out. Leaks could also cause damage to the motor, fan blades, and other internal parts.
How Do Leaks Start?
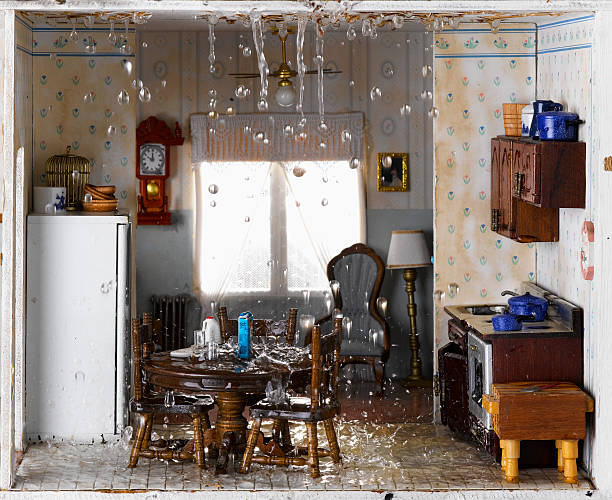
A blocked drain will lead to water leaking into the house. This could cause damage to floors, walls, ceilings, appliances, furniture, and even electrical wiring. If you notice a dripping faucet, check the bottom panel of the refrigerator. If it doesn’t seem like there’s anything wrong, call a plumber.
How to Unclog the Defrost Drain?
The defrost drain is located under the refrigerator door. If it isn’t working properly, you’ll notice water leaking out of the bottom of the unit. This could indicate a clogged drain pipe. To unblock the drain, follow these steps:
Step 1: Remove the back panel of the fridge.
Step 2: Look for the drain cover. You’ll find it near the bottom of the fridge. Locate the drain cover and lift it up.
Step 3: Lift the drain cover completely. Now, look inside the drain. There might be a small amount of food stuck in there. Use a spoon to clear the drain.
Step 4: Replace the drain cover. Put the back panel back on the fridge.
If you still experience problems, contact a professional plumber.
How to Unclog the Water Line?
Don’t call a plumber if you’re having problems with clogged drains. You probably already know how to fix this problem yourself. All you need are some basic tools and instructions. Here’s what you’ll need: A plunger, a plastic bucket, a snake, a flexible rubber hose, a wrench, and a flashlight.
Step one: Turn off the water supply valve. This step is essential because you don’t want to flood your house while you’re trying to solve the problem.
Step two: Remove the stopper from the sink. If you don’t see a stopper, look under the sink.
Step three: Insert the plunger into the drain. Push down hard and hold it there for about 15 seconds. Make sure you keep pushing downward and outward, away from the wall. Don’t let the plunger touch the sides of the pipe.
Step four: Pull up the plunger slowly when you hear the sound of air being sucked into the drain. Keep pulling upward until the air stops flowing. Once the airflow stops, turn off the water supply valve again.
Step five: Now, take the snake and insert it into the drain. Slide it around until you feel resistance. Try twisting the snake clockwise and counterclockwise. Do this several times to loosen the clog.
Step six: Pull the snake out of the drain. Squeeze the end of the snake to release any remaining water. Then use the wrench to unscrew the pipe cap.to Clear the Water Inlet Valve
The water inlet valve controls the amount of water flowing into the ice maker and the water tank. This video demonstrates how to clear the water inlet valves.
To clear the water inlet, you must shut off the cold water supply and open the drain valve located under the sink. Once the water inlet valve is cleared, you can turn the cold water back on.
If the water inlet valve does not work properly, it must be replaced. The repair kit includes the parts needed to fix the problem.
How Often Do You Replace the Whole Water Filter?
Your water filter must be replaced every six months to keep you healthy. But what happens if the filter leaks? Or does it leak? And how do you know if it’s leaking? Do you really want to take the chance of mold growing inside your home?
A cracked or damaged filter could cause bacteria to grow inside your home. This can make you sick and even kill you. So if you notice any signs of leakage, replace the whole filter.
Water Filter, Same Leak–Now What?
The water filter you installed in your home might be leaking. While checking whether the filter needs replacement is easy, what about the entire assembly? If you don’t know how to do that, here are some tips to help you find out.
First, turn off the faucet. You want to make sure no water is flowing into the filter. Then, unscrew the old one. Now, look inside the housing where the filter sits. Is there anything sticking up? If so, use a screwdriver to push it down. This could indicate a leaky seal. Next, take a flashlight and shine it directly on the bottom of the filter. Do you see the light coming through? If so, you probably have a leak.
If you still don’t see any leaks, try removing the filter. Look closely at the threads and seals. Are they damaged? If so, replace the whole thing. Otherwise, just replace the filters.
Drain Pan
The refrigerator drains into the sink via a drain pan. This is where food waste goes. If you notice a buildup of water under the refrigerator, it could mean that the drain pan needs replacing. To replace the drain pan, turn off the power supply to the refrigerator. Remove the screws holding down the drain pan cover. Lift up the drain pan cover. Remove the old drain pan. Put a new drain pan over the drain hole. Tighten the screws. Turn on the power supply to the fridge.
Water Tank Assembly
The water tank assembly is located behind the refrigerator door. You can usually see it because it looks like a large plastic box. To open the assembly, you must first remove the cover plate. Then, you must remove one screw holding the lid in place. After that, you can lift up the lid and pull out the tube. If you don’t want to take off the whole assembly, you can use pliers to pry apart the two halves of the lid. Once you’ve removed the tube, you’ll need to replace the lid and tighten the screws.
Tips for a Smooth Running Fridge
A refrigerator is one of those things you don’t want to think about too much. But it does run 24 hours a day, seven days a week, 365 days a year. So it pays to keep it well-maintained. Here are some tips to make sure your fridge runs like clockwork.
Storage
Food should be stored loosely in refrigerators and freezers to maximize its shelf life. Tightly packing food in the fridge or freezer helps it retain its temperature for longer periods of time. However, too much space between items can lead to spoilage. This infographic explains how to store food properly to ensure you always have delicious meals on hand.
Gaskets
A door gasket is an important part of keeping food fresh longer. In fact, it’s one of the most overlooked items in kitchens. But do you know what type of gasket you are using? If not, here are some tips to help you find out.
The best way to check your gasket is to open the refrigerator door and look inside. You want to see if there is anything hanging off the edge of the door frame. This could indicate a leaky gasket. If you don’t see anything, then it’s probably fine. However, if you notice something hanging off the edge of your door frame, then you need to replace your gasket.
If you aren’t sure whether you need a new gasket, consider how often you use your refrigerator. Do you use it daily? Weekly? Monthly? If you use it weekly, you might consider getting a new gasket every week. If you use it monthly, then you might want a new gasket every month.
You can also inspect your gasket yourself. Look around the edges of the door frame. Does the gasket appear loose? Is it bulging up? If so, then you likely need to replace it.
Another option is to call a professional to come over and inspect your door. They will be able to tell you whether or not you need new gaskets.
How much does professional refrigerator repair cost?
A good rule of thumb is that you should spend no more than 20% of the value of an appliance on repairs. This includes repairing refrigerators, freezers, dishwashers, washing machines, dryers, air conditioners, heat pumps, water heaters, stoves, microwaves, ovens, ranges, and hot tubs. If you are buying used equipment, it’s even better to budget less than half of what the price tag says it costs.
According to Consumer Reports, most appliances should last about five years before needing major repairs. However, some models, especially those built in the 1990s, may require replacement sooner. You don’t want to buy a brand-new model because it might break down soon after it arrives.
Have you ever had a problem with your refrigerator leaking water?
If yes, then you probably don’t want to hear this story.
Kenmore has recently recalled over 2 million refrigerators because they leak water from the compressor.
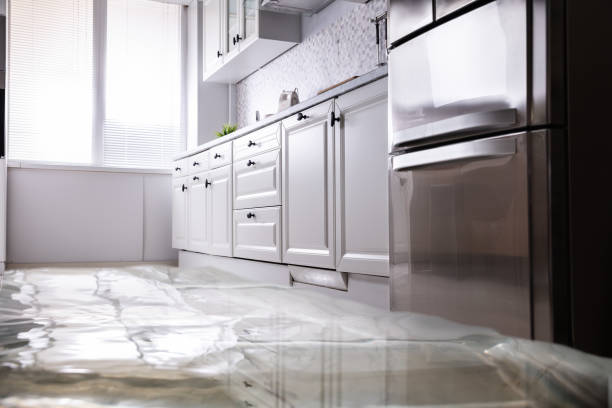
This is a serious issue that can cause damage to your home and even put your health at risk.
The company says that the problem was caused by a faulty part called a “rotor shaft seal�.
They say that this part failed due to normal wear and tear.
This is a serious issue that requires immediate attention.
If you notice any signs of leakage or water damage, call a professional immediately
How to Fix Kenmore Refrigerator Leaking Water
Kenmore refrigerator leaking water is a common problem among homeowners. It happens because of a faulty compressor or a leaky pipe. To fix this issue, you need to check if the refrigerator door seals properly. If not, you need to replace the rubber gaskets. Also, check if the drain pan is clogged. If it is, clean it using a brush. After cleaning, check if the water level is low. If yes, fill it up. Then, turn off the power supply and wait until the unit cools down. Once cooled down, open the door and check if the water is flowing normally. If yes, the problem is solved. However, if no water flows, call a professional technician to repair the appliance.
1. Level the Refrigerator
To fix the problem, you need to remove the shelves from the refrigerator. Remove the screws holding the shelves in place. Make sure that the shelves are completely removed from the refrigerator. Now, remove the back panel of the refrigerator. Look for the drain hole. Clean the drain hole using a brush. Fill the drain hole with baking soda. Replace the back panel and screw it in place. Turn on the power supply and wait for the unit to cool down. Once cooled down open the door and check whether the water is flowing normally or not. If yes, the water was drained properly. If no, call a professional technician. 2. Check the Compressor Answer: If the water is draining slowly, but still coming out, it could mean that the compressor is damaged. In such cases, you should contact an expert technician who can diagnose the problem. He/she will inspect the compressor and replace it if necessary.
How to Level your Kenmore Refrigerator
Leveling your refrigerator is very easy. First, turn off the power supply. Then, remove the back panel. Next, remove the shelves. Finally, remove the bottom panel. After removing the panels, you should see a drain pipe. This drain pipe is connected to the water line. It drains the water from the refrigerator. To level your refrigerator, you need to clean the drain pipe. Use a brush to clean the drain pipe and fill it with baking soda. Replace everything and turn on the power supply. Wait for the unit to cool. Open the door and check whether water flows normally. If yes, the problem is solved. If no, call an expert technician. 3. Fix the Drain Line Answer: If you notice that the water is leaking from the drain pipe, it could mean that there is a leak in the drain line. In such cases, the drain line needs to be replaced. Call an expert technician to repair the drain line.
2. Check and Replace the Water Tank Assembly if Necessary
If the water tank assembly is leaking, it needs to be replaced. An expert technician can replace the water tank assembly. 1. Clean the Condenser Coil Answer: To fix the condenser coil, first, disconnect the power supply. Remove the fan shroud and the fan. Clean the fan blades with a dry cloth. Clean the fins with a wet cloth. Clean the condenser coils with compressed air. Reassemble the parts and reconnect the power supply.
How to replace Kenmore Refrigerator Water Tank Assembly
Remove the door panel. Disconnect the wires from the compressor motor terminals. Remove the screws holding the compressor motor bracket. Remove the compressor motor bracket. Unscrew the compressor motor. Remove the compressor motor. Remove and discard the old compressor motor. Install the new compressor motor. Reconnect the wires to the compressor motor terminals. Screw the compressor motor back into place. Tighten the compressor motor mounting bolts. Replace the door panel. 2. Check and Replace the Compressor Motor if Necessary Check the compressor motor for cracks. If the compressor motor is cracked, replace it. To remove the compressor motor, loosen the retaining nut. Pull the compressor motor off the compressor mounting plate. Remove the compressor motor mounting plate. Replace the compressor motor. Tighten the compressor mounting bolt. Replace the compressor motor mounting plate and tighten the retaining nut.
3. Unclog the Defrost Drain
Unplug the refrigerator. Open the freezer door. Remove the ice tray. Remove the ice cube trays. Remove the ice cube tray liner. Clean the drain pan. Reinstall the ice cube tray liner and ice cube trays. Plug the refrigerator back in. 4. Check the Door Seal Answer: Open the refrigerator door. Close the refrigerator door. Push down on the door handle. Is the door still sealed? If not, check the gasket around the door opening. If the gasket is damaged, replace it.
How to Unclog Kenmore Refrigerator Defrost Drain
Open the refrigerator door. Close it. Press down on the door handle to see if it seals properly. If the door does not seal properly, remove the gasket from the door frame. Replace the gasket.
4. Check the Drain Pan
Unplug the refrigerator. Remove the drain pan from the back of the refrigerator. Clean the drain pan with soap and warm water. Rinse thoroughly. Reinstall the drain pan. Plug the refrigerator back into power. Open the refrigerator door. Close the door. Press down on the handle to see if it closes properly. If the door doesn’t close properly, replace the gasket. 5. Check the Door Seal Answer: Unplug the refrigerator. Remove any screws holding the door panel in place. Pull off the door panel. Clean the door seal with soap and warm water, rinse thoroughly. Replace the door panel. Screw the door panel back onto the refrigerator. Plug the refrigerator back in to power. Open the refrigerator. Close the door. Push down on the handle to check whether the door closes properly. If the handle does not close properly, replace the door seal.
i. The drain pan is overflowing
Unplug the refrigerator. Disconnect the drain hose from the sink faucet. Turn off the cold water supply. Remove the drain pan. Wash the drain pan with soap. Rinse the drain pan. Reconnect the drain hose to the sink faucet and turn on the cold water supply. Test the drain pan for leaks. If no leak is found, reconnect the drain pan to the refrigerator. Plug the fridge back in to power. Close the refrigerator door. Open the refrigerator door again. Close the door. ii. The door won’t shut Answer: Unplug refrigerator. Remove the door panel. Clean any dirt or debris from around the hinges. Wipe away any excess moisture. Replace the door panel and reinstall the door. Plug the refrigerator back to power. Open the door. Close the door and push down on the handle to test whether the door closes properly
ii. The drain pan is not properly installed
Check the instructions included with the appliance for proper installation. If the instructions are unclear, contact the manufacturer.
iii. There is a crack on the drain pan
If the crack is located near the bottom of the drain pan, it could indicate that the drain pan needs to be replaced. Contact the manufacturer for replacement parts. iv. The drain pan is leaking Answer: If the leak is slow, it could indicate that a part needs to be replaced. If the leak is fast, it could indicate that something else is wrong. Contact the manufacturer for assistance.
5. Check the Water Line
Check the water line for leaks. If the leak is slow it could indicate that a hose needs to be replaced. A fast leak could indicate that a pipe or joint needs to be replaced. 6. Check the Drain Pan Answer: If the crack is located near to the bottom of the drainpan, it could indicate that it needs to be replaced. It could also indicate that the drain pan is not properly installed.
Kenmore Refrigerator
If you hear any unusual noises coming from the refrigerator, check the door seals and hinges. If the seals are loose or the hinges are damaged, the noise could be caused by ice buildup. To prevent future problems, remove the ice tray and clean the area around the hinge. 7. Check the Door Handle Answer: If the handle does not turn easily, it could indicate that the latch mechanism is broken. This could mean that the door won’t open or shut properly. If the handle turns freely but doesn’t lock into place, the door could be stuck. Try pulling the door toward you to see if it moves. If it doesn’t move, try pushing down on the handle while holding the door closed. If the handle still doesn’t move, call a repairman.
Leaking Brown Liquid – Why and What to Do
Brown liquid leaking from under the sink is usually caused by a leaky faucet. It’s important to know how to stop the leak because it can lead to serious damage. First, turn off the water supply to the faucet. Next, pull the hot and cold knobs away from each other until the faucet stops dripping. Then, tighten the screws that hold the faucet together. Finally, replace the washer and nut that were removed earlier. 8. Clean the Drain Line Answer: If you notice a foul odor emanating from the drain line, it could be due to a clog. To fix this problem, first pour boiling water down the drain. Let the water run for about 15 minutes. Afterward, remove the stopper from the drain pipe and flush the drain using a plunger. If the smell persists after flushing, contact a plumber.
1. The drain pan is dirty and leaking
If you notice a foul odor coming from the drain pan, it could be due a clogged drain. To fix this problem first pour boiling water down into the drain. Let the hot water run for about 15 min. Afterward, remove any debris from the drain. Then, clean the drain pan with a brush and soap. Replace the stopper and let the drain dry completely. 2. The drain pan is full of hair Answer: Hair can block drains and cause leaks. To prevent this problem, pour boiling water down the sink and let it run for about 15 minutes, then remove the hair from the drain.
2. The compressor is leaking
To repair this problem, turn off the power supply to the unit. Remove the screws holding the top panel together. Disconnect the wires attached to the motor terminals. Clean the compressor with a wire brush and replace the top panel. 3. The drain pan is overflowing Answer: Pour boiling water down the sink until the overflow stops. Then, clean the overflow area with a brush and soap and replace the stopper.
Kenmore Refrigerator Leaking Water from Water Dispenser – Solution
If the water dispenser is not working properly, check if the faucet is turned on. Turn the faucet off and try again. If the water still does not flow, remove the cap from the bottom of the refrigerator and see if any water leaks out. If there is no leak, check the filter. It could be clogged. Try cleaning it with a toothbrush and warm water. Replace the filter if necessary. How To Repair A Kenmore Refrigerator Water Dispenser – DIY Guide Answer: 1. Check if the faucet was turned on. Turn the water off and try again. 2. If the water still doesn’t flow, remove the cap of the refrigerator and see whether any water comes out. 3. If there’s no leak, check the filters. 4. If the filters are clogged, clean them with a toothbrush and hot water. 5. Replace the filters if needed. 6. Make sure the faucets are tightly closed. 7. Close the door of the refrigerator. 8. Wait for about 30 minutes. 9. Open the door of the refrigerator and see how the water flows. 10. If the water continues flowing normally, the problem may be solved. 11. If the water still won’t flow, call an expert plumber.
Kenmore Water Inlet Valve Leaking – What to Do
1. Check if the faucal was turned on. Turn off the water and try again. 2. If the water still doesn’t flow, remove the cap and see if any water comes out. If there is, turn the faucal back on and wait for another minute. 3. If the water still hasn’t flowed after waiting for a minute, check the filters. Clean them with a toothbrush. 4. Replace the filters if necessary. 5. Make sure the faucal is tightly closed. 6. Close the door of refrigerator. 7. Wait for about 30 minuets. 8. Open the door of refrigerator and see how the faucal works. 9. If the water continues to flow normally, the problem may solve itself. 10. If the faucal still doesn’t work, call an expert plumbur. Kenmore Refrigerator Water Filter Replacement Cost | Best Way To Fix Answer: 1. Remove all the screws holding the top cover. 2uld deliver the entire device ineffective. pressure cookers must be opened once it has finished the cooking cycle. The pressure inside the cooker must be delivered so the cover would then be able to be opened securely. The pressure is delivered gradually through the little valve or a whistle that is regularly situated on the head of the lid.
How to Replace Kenmore Refrigerator Water Inlet Valve
onsist of an inward pot and a lid. All pressure cookers need to have a tight seal for them to work appropriately. Pressure cookers should likewise contain some kind of cooking fluid, for example, a stock or water for steam to be made. When the water inside the internal pot begins to heat up, the steam that is made inside the compartment makes the pressure inside the cooker grow. Attributable to the expanded pressure in the pot, the temperature additionally rises impressively, permitting food to prepare a lot quicker and all the more uniformly. The high-pressure climate must be kept up consistently. Accordingly, this implies that instant pots can’t be opened mid-way the cooking. Opening the fixed cover would make the developed pressure escape, which would deliver the entire device ineffective. pressure cookers must be opened once it has finished the cooking cycle. The pressure inside the cooker must be delivered so the cover would then be able to be opened securely. The pressure is delivered gradually through the little valve or a whistle that is regularly situated on the head of the lid.
How to Replace Kenmore Refrigerator Ice Maker Fill Tube
Kenmore refrigerator ice maker fill tube replacement is very easy. Just follow these steps. 1. Remove the old fill tube 2. Take off the back panel 3. Unscrew the screws holding the back panel 4. Pull the back panel away from the freezer 5. Disconnect the wires 6. Screw the new fill tube into place 7. Put the back panel on 8. Connect the wires 9. Reassemble the unit 10. Turn on the power 11. Enjoy!
Click Here to Buy yours Now!
To replace the Kenmore refrigerator ice maker fill tubes, you will need to remove the back panel. This is done by unscrewing the two screws located near the top left corner of the back panel. Once the back panel is removed, you will see the fill tube assembly. To replace the fill tube, simply pull it out and take it to a local appliance repair shop.
Kenmore Side by Side Refrigerator Water Filter Leaking – How to Solve
If you notice any leaking from the side by side refrigerator filter, you should immediately contact a professional service technician. It is important to note that if you attempt to fix the problem yourself, you could end up causing further damage to the unit.
1. The Water Filter Head is Damaged
If the water filter head is damaged, you will see water dripping from the top of the unit. This indicates that the water filter head needs to be replaced. 2. The Water Filter Valve is Broken Answer: If you notice that the water filter valve is broken, you will see water flowing from the bottom of the unit. This means that the water filter valve needs to be replaced. The water filter valve is located near the back of the unit.
2. The Water Filter is not Compatible with Your Refrigerator
If the water filter is not compatible with your refrigerator, you will see water coming out of the side of the unit. This could mean that the water filter needs to be replaced. To check if the water filter is compatible with your refrigerator, remove the water filter from the unit and place it on the floor. Then, turn off the power switch and open the door of the refrigerator. If the water filter does not fit into the opening of the refrigerator, replace it immediately. 3. The Water Filter is Not Cleaning Properly Answer: If your water filter is not cleaning properly, you will see dirty water coming out of the unit. This may indicate that the water filter needs replacing. To clean the water filter, first shut down the unit. Remove the water filter from the tank and wash it under running water. Make sure to rinse the filter thoroughly. Replace the water filter and turn on the power switch.
3. The Water Filter was not Properly Installed
If the water filter was not installed correctly, you will see dirty or cloudy water coming out of the bottom of the unit. This indicates that the water filter needs replacement. To replace the water filter, first turn off the power switch. Remove the old water filter and install the new one. Turn on the power switch and test the water quality. If the water is still dirty or cloudy, replace the water filter again. 4. The Water Filter is Leaking Answer: If the water filter leaks, you will see water dripping out of the unit. It may indicate that the water seal around the water filter needs to replaced. To replace the water seal, first turn off the unit. Remove the old water seal and install the new one on the top of the water filter. Turn on the power and test the water quality after installing the new water seal.
4. There’s Air Trapped in the Water Line
There could be air trapped in the water line. To remove the air from the water line, first turn off the water supply. Then, open the faucet until the water stops flowing. Open the drain valve and let the water flow freely. Close the drain valve when the water stops draining. Repeat these steps until no more air bubbles appear in the water line. 5. The Water Supply is Not Connected Correctly Answer: If the connection between the water supply and the water line is not connected properly, you will see water leaking out of the unit. To fix this problem, first turn off the electricity. Disconnect the electrical wire from the water supply. Then reconnect the wires according to the manufacturer’s instructions.
5. The Water Filter Housing has a Crack
If the filter housing has a crack, you will see water dripping out of the unit. This happens because the filter element is clogged. To clean the filter, first turn off the power. Remove the filter element from the housing. Clean the filter element using a sponge soaked in vinegar. Replace the filter element back into the housing. Turn on the power again. 6. The Drain Valve Is Clogged Answer: If the drain valve is clogged, you will see water coming out of the unit. First, turn off the power. Unscrew the drain valve. Clean the drain valve using a sponge soaked in white vinegar. Screw the drain valve back onto the unit. Turn on the power.
How to Replace the Water Filter Housing of a Kenmore Refrigerator
1. Open the refrigerator door. 2. Pull the bottom panel of the refrigerator away from the wall. 3. Lift the top panel of the refrigerator away. 4. Remove the screws holding the filter housing to the refrigerator. 5. Disconnect the wires connected to the filter housing. 6. Remove the old filter housing. 7. Install the new filter housing. 8. Connect the wires to the filter housing. 9. Put the top panel of the fridge back on. 10. Close the refrigerator door.
Why does refrigerator leak water?
If you notice that your refrigerator is leaking water, you need to check if the door seals properly. This is because if the door does not seal properly, moisture will leak into the fridge. To fix this problem, you need to clean the area around the door. Make sure that the rubber gasket is well attached to the frame. Also, ensure that the door handle is not loose. It is important that you tighten the screws that hold the handle to the door. If these steps fail to solve the problem, you need to call a professional repairman.
How do you unclog a refrigerator drain tube?
If you notice any clogs in your refrigerator drain tube, try using a plunger to clear the blockage. This method works well if you notice a clog after running the dishwasher. If you notice a clog while washing dishes, you can try using a wire brush to remove the debris from the drain. If neither of these methods work, you can call a professional plumber to help you fix the problem.
How do you stop a refrigerator from leaking water?
Refrigerators are designed to maintain items cold. However, if the door is not properly closed, the compressor will run continuously to cool down the air inside the fridge. This continuous operation will eventually lead to condensation build up inside the unit. Over time, the condensation will drip into the cabinet and accumulate. Eventually, the accumulated water will seep through the seams and cracks in the cabinet and leak onto the floor.

It's knowing what you're doing and having a good basic foundation.
That's why my mission is to teach you the fundamentals of great cooking...
So you can start creating delicious dishes without any rules or restrictions whatsoever.
With my step-by-step instructions, my unique insider secrets and techniques,
You'll be able to easily take ordinary food and make it extraordinary!
- How to Prolong the Life of Your Kitchen Appliances - December 22, 2024
- How Long does Yogurt Take to Freeze - May 5, 2023
- Top 10 best restaurants in Montana - May 1, 2023