Last Updated on May 13, 2022
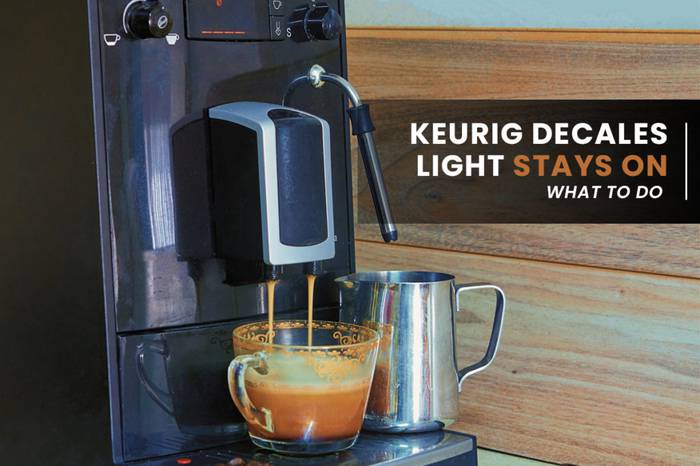
Have you ever had problems with Keurig coffee makers? If yes, then you might want to read this article. Keurig has recently released a new model called Keurig Descale Light Stays On.
This machine is designed to prevent over brewing or under brewing. The problem is that some owners are reporting that their machines are stuck in this mode.
Keurig has always been known for its innovative designs and quality products. In addition to coffee makers, they also produce other appliances such as kettles, espresso machines, and even refrigerators. Their latest innovation is the Keurig Descale light stays on.
This new model was launched after several complaints from customers who experienced issues with their previous models. Some owners reported that their machines would stop working properly after months of usage. They also complained that the lights on their machines would stay on even though no water was being dispensed.
What causes the descale light to appear?
The descale light’s sole purpose is to indicate or inform you that your coffee maker is filthy and requires cleaning.

When water runs through the machine, a phenomenon called as scaling occurs. This occurs when tiny calcium particles and other sediments build in the inner workings of your coffee maker’s mechanism. The descaling light will turn on automatically if something like this happens. In a nutshell, your machine now need cleaning. If the machine becomes extremely filthy, it may stop operating.
How can you fix your Keurig’s descaling light problem?
The hardness of your water is the most likely cause of scaling. I would suggest using gentler water in your Keurig machine. If you have hard water, you may need to get your machine scaled on a regular basis. Filtered water makes a mess and lights up the room.
The descaling light in your Keurig is turned on for a specific and apparent purpose. You may descale the machine by using a chemical called Dezcal.
You may also add vinegar to speed up and improve the procedure. Inside the machine, pour the Dezcal and vinegar combination. The descale light will turn off as a result of this. After a few months, you’ll need to apply the descaling solution to keep your computer in good working order. You will want the descaling solution for this.
In easy stages, learn how to clean the equipment.
- Remove the water filter from your Keurig and empty it. Then switch off the machine.
- Fill the machine with the descale solution.
- Fill a bottle halfway with water and place it in the reservoir.
- Simply turn the machine on and place a cup underneath it.
- Pour the contents of the bowl into the sink.
- The procedure is repeated, this time with the addition of water and the illumination of the light.
- Set the timer for 30 minutes on the brewer.
- Ensure that the reservoir is well rinsed.
- Repeat these procedures 10-12 times to thoroughly clean it.
What is the procedure for resetting the Keurig descale light?
Follow these procedures to address the issue:
Step 1: Turn off the electricity to the entire house in step one. Then totally disconnect the gadget.
Step 2: Remove the keurig coffeemaker’s cover. Remove the filter basket now.
Step 3 – Remove the keurig coffee maker’s top section. Pull remove the bottom tray after removing the lid.
Step 4 – Remove the screws that secure the descaler assembly. Carefully disassemble the descaler assembly so that no components fall out.
Step 5: Use warm water and dish soap to clean the descaler. Make sure the descaler is properly cleaned. Also, ensure sure the descaler does not come into contact with anything while it is being washed.
Step 6: Assemble everything back together. Reassemble the descaler assembly on the keurig coffee maker. Reconnect the device.
How to descale a Keurig?
Regardless of the brand, a coffee maker must be properly maintained to keep it running for a longer length of time. If you haven’t descaled your Keurig in a while, this might be the cause of its inability to work.
Descaling is an important and beneficial preventive maintenance procedure that should be performed on a regular basis. It aids in the removal of any wastes and pollutants left behind by the water. Keurig advises descaleing your coffee machine every three to six months, depending on how much coffee you produce.
The items listed below are necessary.
- This isn’t a plastic cup; instead, it’s a massive ceramic container.
- Drinking water that is free of contaminants
- Keurig’s descaling solution
- Having access to a sink
It’s possible that the descaling process will take up to 45 minutes. Check to see if the machine has any pods in it. Clean the reservoir by removing all of the contents. Remove and store your Keurig water filter if you have one.
STEP ONE
Press the power button to turn off your Keurig. Pour the entire bottle of Keurig descaling solution into the empty reservoir. Using the water from the empty bottle, fill the reservoir. Start the brewer, set your cup on the drip tray, and wait a few minutes until it to brew. Select a brew pot with the largest capacity as well as plenty of hot water.
STEP TWO
Continue brewing until the water indicator light turns green. There aren’t any more pods available! Turn off the "Auto Off" option if your Keurig has it. After powering on your Keurig, wait at least 30 minutes. Then drain and thoroughly rinse whatever is left in the reservoir.
FINAL STEP
Fill the reservoir with clean water until it reaches the MAX fill line. Place your cup on the drip tray and choose the largest brew size available (no pods!).
Remove all of the contents in the container and rinse it with the largest brew size at least twelve times. While you’re doing this, you’ll need to refill the reservoir.
When your coffee maker stops working or has problems, it’s typically because it’s dirty and needs cleaning.
The best way to clean your Keurig is to use a descaling solution. This chemical-free cleaner works great and helps remove any buildup inside the unit.
Everyone enjoys a cup of coffee in the morning or at any other time of the day. When you switch on your Keurig and place your cup of coffee, you won’t hear the typical sounds it produces, and there will be a light that lights on and stays on.
Are you unsure how to resolve this vexing problem? Today, we’ll look at the best way to keep the descale light on your Keurig from turning off.
First and foremost, Keurig is a coffee maker firm that makes single-serve coffee machines.
What causes the descale light to appear?
The descale light’s sole purpose is to indicate or inform you that your coffee maker is filthy and requires cleaning.
When water runs through the machine, a phenomenon called as scaling occurs. This occurs when tiny calcium particles and other sediments build in the inner workings of your coffee maker’s mechanism. The descaling light will turn on automatically if something like this happens. In a nutshell, your machine now need cleaning. If the machine becomes extremely filthy, it may stop operating.
How can you fix your Keurig’s descaling light problem?
The hardness of your water is the most likely cause of scaling. I would suggest using gentler water in your Keurig machine. If you have hard water, you may need to get your machine scaled on a regular basis. Filtered water makes a mess and lights up the room.

The descaling light in your Keurig is turned on for a specific and apparent purpose. You may descale the machine by using a chemical called Dezcal.
You may also add vinegar to speed up and improve the procedure. Inside the machine, pour the Dezcal and vinegar combination. The descale light will turn off as a result of this. After a few months, you’ll need to apply the descaling solution to keep your computer in good working order. You will want the descaling solution for this.
In easy stages, learn how to clean the equipment.
Remove the water filter from your Keurig and empty it. Then switch off the machine.
Fill the machine with the descale solution.
Fill a bottle halfway with water and place it in the reservoir.
Simply turn the machine on and place a cup underneath it.
Pour the contents of the bowl into the sink.
The procedure is repeated, this time with the addition of water and the illumination of the light.
Set the timer for 30 minutes on the brewer.
Ensure that the reservoir is well rinsed.
Repeat these procedures 10-12 times to thoroughly clean it.
What is the procedure for resetting the Keurig descale light?
Follow these procedures to address the issue:
Step 1: Turn off the electricity to the entire house in step one. Then totally disconnect the gadget.
Step 2: Remove the keurig coffeemaker’s cover. Remove the filter basket now.
Step 3 – Remove the keurig coffee maker’s top section. Pull remove the bottom tray after removing the lid.
Step 4 – Remove the screws that secure the descaler assembly. Carefully disassemble the descaler assembly so that no components fall out.
Step 5: Use warm water and dish soap to clean the descaler. Make sure the descaler is properly cleaned. Also, ensure sure the descaler does not come into contact with anything while it is being washed.
Step 6: Assemble everything back together. Reassemble the descaler assembly on the keurig coffee maker. Reconnect the device.
How to descale a Keurig?
Regardless of the brand, a coffee maker must be properly maintained to keep it running for a longer length of time. If you haven’t descaled your Keurig in a while, this might be the cause of its inability to work.
Descaling is an important and beneficial preventive maintenance procedure that should be performed on a regular basis. It aids in the removal of any wastes and pollutants left behind by the water. Keurig advises descaleing your coffee machine every three to six months, depending on how much coffee you produce.
The items listed below are necessary.
- This isn’t a plastic cup; instead, it’s a massive ceramic container.
- Drinking water that is free of contaminants
- Keurig’s descaling solution
- Having access to a sink
It’s possible that the descaling process will take up to 45 minutes. Check to see if the machine has any pods in it. Clean the reservoir by removing all of the contents. Remove and store your Keurig water filter if you have one.
STEP ONE
Press the power button to turn off your Keurig. Pour the entire bottle of Keurig descaling solution into the empty reservoir. Using the water from the empty bottle, fill the reservoir. Start the brewer, set your cup on the drip tray, and wait a few minutes until it to brew. Select a brew pot with the largest capacity as well as plenty of hot water.
STEP TWO
Continue brewing until the water indicator light turns green. There aren’t any more pods available! Turn off the "Auto Off" option if your Keurig has it. After powering on your Keurig, wait at least 30 minutes. Then drain and thoroughly rinse whatever is left in the reservoir.
FINAL STEP
Fill the reservoir with clean water until it reaches the MAX fill line. Place your cup on the drip tray and choose the largest brew size available (no pods!). Remove all of the contents in the container and rinse it with the largest brew size at least twelve times. While you’re doing this, you’ll need to refill the reservoir.
When your coffee maker stops working or has problems, it’s typically because it’s dirty and needs cleaning.
Conclusion
In conclusion, we hope our guide helped you understand what causes Keurigs to stop working. We also provided some tips on how to fix them when they do break down. Hopefully, these steps help you avoid having to replace your Keurig altogether.

It's knowing what you're doing and having a good basic foundation.
That's why my mission is to teach you the fundamentals of great cooking...
So you can start creating delicious dishes without any rules or restrictions whatsoever.
With my step-by-step instructions, my unique insider secrets and techniques,
You'll be able to easily take ordinary food and make it extraordinary!
- How to Prolong the Life of Your Kitchen Appliances - December 22, 2024
- How Long does Yogurt Take to Freeze - May 5, 2023
- Top 10 best restaurants in Montana - May 1, 2023