Last Updated on November 8, 2022
Are you tired of dealing with leaking refrigerators? If yes, then these Hitachi refrigerator fixes might be handy for you. After reading these things, I am sure you would love to fix them by yourself.
There are a number of reasons why your refrigerator leaks. They can be caused by corrosion, faulty seals, or damaged gaskets. Whatever the reason, it’s essential to get your fridge fixed before it drips water down the walls.
Here are some ways to quickly repair your leaky refrigerator without spending much time or effort. These simple tips can save you a lot of trouble and frustration.
Quick Fixes to Hitachi Refrigerator Leak
1. Toilet Bowl Cleaner
Toilet bowl cleaner is often the first thing people think about when their refrigerator leaks. You may have heard that toilet bowl cleaner is bad for the environment, but if you want to save money and help the planet, just mix baking soda (the active ingredient in the toilet bowl) with water. Then use a spray bottle to apply it directly to the inside of any leaky faucet or pipe. If that doesn’t work, try adding dish soap.
2. Vinegar
Vinegar is another inexpensive way to stop minor leaks. Just add vinegar to the area where the water is leaking a bit, and let it sit overnight. The following day, remove what’s left of the liquid using a soft cloth and rinse out the pipes.
3. White Glue
White glue is yet another cheap fix when it comes to stopping leaks. Simply add some white glue to the area of leakage and then place something under the sink to weigh down the glue. Wait until it dries, and then carefully remove the weight.
If none of these steps work, call a professional plumber!
Water Leaking from Hitachi Fridge – How to Fix
A water leak from a refrigerator is always a big problem. If you are facing such a situation, don’t panic. Here we are sharing some tips on how to fix a leaking refrigerator.
If there is a small amount of water dripping from the refrigerator, then there is nothing to worry about. But if the leakage is continuous, then you must immediately call a professional to check whether the refrigerator needs repairs.
The most common reason for a leaking refrigerator is a damaged gasket. A gasket is used to seal the air inside the refrigerator. When the gasket becomes weak, then it causes moisture to seep out of the fridge. So, it is very important to replace the gaskets regularly.
Another cause of a leaking refrigerator could be a loose connection. You must check all the connections and tighten those properly. Also, make sure that the compressor is well-fixed. If the compressor is not working properly, it might create a pressure difference. Due to this, the water will flow into the refrigerator.
Apart from replacing the gasket and tightening the connections, you must also check the drain pan. If the drain pan is clogged, it will stop draining the water. In such cases, you must clean the drain pan properly. If you do not clean it properly, you will face problems like flooding.
Once the temperature reaches 120 degrees Fahrenheit, you can try cleaning the drain pan manually. You can use a hair dryer to heat the area around the drain pan. Make sure that you do not touch the electrical parts of the refrigerator.
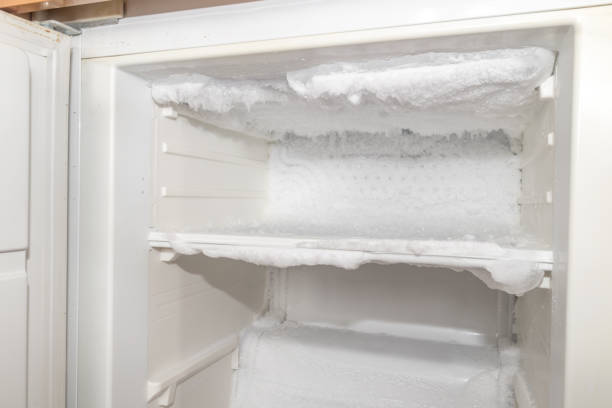
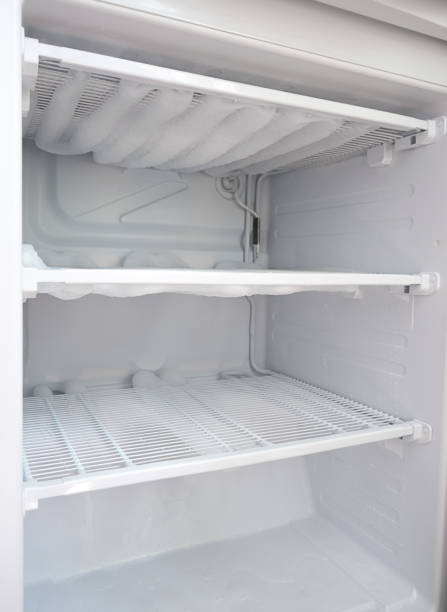
Clogged Defrost Drain
Clogged drains are one of the most common plumbing issues homeowners face. When water backs up into the pipes, it causes damage to the drainage system. If you suspect your defrost drain is clogged, here are some tips for cleaning it properly.
Step 1 – Turn off the power valve located near the faucet. This will stop the flow of cold water.
Step 2 – Remove the aerator assembly from the drain pipe. Gently pull the aerator away from the drainpipe. A rubber gasket is covering the opening where the aerator attaches to the pipe.
Step 3 – Use a plunger to push down on the drainpipe to release any trapped air bubbles. Then use a snake to clear debris from the drain.
Step 4 – Once everything is cleared out, replace the aerator and turn the power valve back on.
Step 5 – Run hot water through the drain to flush out any remaining debris. Make sure to run warm water since cold water could damage the rubber seal around the aerator.
Step 6 – Reinstall the aerator and test the drain once again.
The Water Filter
Check if the water filter is properly fitted before you replace it. If you’re having problems with the filter, check the instructions. If you find that the instructions aren’t clear, contact us.
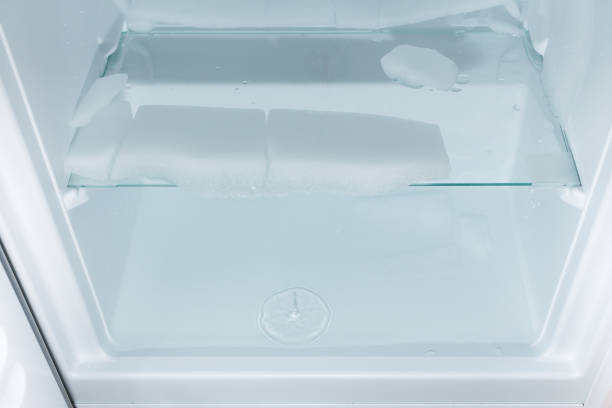
Cracked Water Filter Housing
Water leaks on the floor can occur if there’s an issue related to the defrost drain, such as a clogged filter housing. This problem can cause water to drip onto the floor. Simply plug the drain hole with a paper towel and tape to fix it. If you’re looking for something more permanent, try installing a bucket under the sink to catch the drips.
How to Replace Hitachi Refrigerator Water Filter Housing
A faulty fan will cause the refrigerant compressor to run continuously. This could damage the refrigerant compressor. If you’re replacing the filter housing, make sure to replace the fan too. To do this, follow these steps:
1. Remove the old filter housing.
2. Unscrew the screws holding the fan onto the motor assembly.
3. Disconnect the wires leading from the fan to the motor assembly.
4. Take off the cover plate over the fan.
5. Pull out the fan blades.
6. Unplug the fan.
How to Replace Hitachi Refrigerator Door Seal
If you’re looking to replace the door seal on your refrigerator, you must know what type of seal you require and how to install it properly. This guide will show you how to do just that.
The Hitachi refrigerator door seal is one of the most common seals used today. They are typically found on side-by-side refrigerators and are designed to prevent moisture from entering into the inside of the fridge. If you notice water leaking around the door frame, it could mean that the seal needs replacing.
Simply look for signs of wear and tear to determine whether your seal needs replacing. You’ll see small scratches and cracks along the edge of the seal. These are normal signs of wear and tear and shouldn’t cause concern. However, if you see large holes or tears in the material, it might be time to change the seal.
Replacing the seal isn’t tricky, but it does take some practice. First off, make sure you’ve removed the old seal completely. Then, cut a piece of paper slightly larger than the opening where the seal goes. Place the paper over the hole, and mark the edges of the hole with a pencil. After cutting the paper away, use a utility knife to trim the edges of the hole carefully. Finally, apply a thin silicone caulk layer to fill the gap. Once the caulk dries, place the new seal in position, ensuring alignment correctly.
Once installed, check the seal periodically to ensure it stays in good shape. If it starts to deteriorate again, repeat steps 2 – 4 above.
Dispenser Drip Tray is Full
Empty the drip tray after each washing cycle. This ensures that water doesn’t run down into the machine and causes it to overheat. If you notice that the dispenser isn’t draining properly, check the filter regularly. If the filter becomes clogged, replace it. A dirty filter will affect the performance of the dishwasher.
Have you ever heard of RCA Refrigeration Compressor Actuator leaks?
If you haven’t, then you’re probably wondering what they are and why they happen.
Well, let me tell you about them.
Roughly speaking, refrigerators are machines that cool down food or beverages inside.
They consist of a compressor, condenser coil, evaporator coil, expansion valve, and fan.
The compressor compresses air into a high-pressure gas, which is then cooled by passing through the condenser coil.
This causes water vapor in the air to turn back into liquid water.
Then, the liquid water passes through the evaporator coil, where it turns back into a gas.
Finally, the fan blows the cold air out of the refrigerator.
If you notice that your refrigerator is leaking, then you should immediately check whether the compressor is working properly.
If it isn’t, then you’ll need to replace the compressor
RCA Refrigerator Leaking – What to Do
Refrigerators leak because of several reasons. One of the main reasons is that the seals between the door and the frame are not properly attached. This can happen if the refrigerator was installed improperly or if the door was damaged during shipping. Another common problem is that the gaskets around the doors and the freezer door are worn out. These gaskets prevent moisture from entering the unit. A third reason is that the compressor is leaking refrigerant gas into the air. Finally, the evaporator coils could be clogged with dust or debris.
1. Check the Water Filter
Check the filter for any blockage. It is possible that the filter is clogged with dirt. Cleaning the filter is easy. Just remove the top panel and clean the filter using a vacuum cleaner. Make sure to replace the filter after cleaning it. 2. Check the Compressor Answer: If the compressor is leaking, the compressor will be warm to the touch. Also check the compressor for leaks. Remove the front panel and inspect the compressor. Replace the compressor if necessary.
2. Unclog the Defrost Tube
Unplug the unit from the wall outlet. Open the door and remove the defrost tube. Clean the defrost tube using a brush. Reinstall the defrost tube. Plug the unit back into the wall. 3. Check the Drain Pump Answer: Remove the drain pump. Inspect the drain pump for leaks. Replace the drain pump if necessary.
How to Unclog RCA Refrigerator Defrost Tube
Unclog the refrigerator defrost tube by removing the ice maker. Remove the ice maker from the freezer compartment. Remove the ice tray from the ice maker. Remove any frozen items from the ice maker. Place a towel over the defrost tube. Using a long screwdriver, push down on the end of the defrost tube until it pops out. Pull the defrost tube out of the freezer compartment. Use a wet rag to clean the defrost tube. Put the ice maker back together. Install the ice maker.
3. Check the Water Inlet Valve
Check the water inlet valve to see if it is leaking. Turn off the power switch. Open the door to the refrigerator. Look at the bottom of the door. Is there water dripping onto the floor? If yes, turn off the power switch. Close the door. Turn on the power switch. Wait for about 30 seconds. Then open the door again. If no water drips, check the water level in the tank. It should be full. If not, fill the tank with water. Let the water run into the tank for about 10 minutes. After 10 minutes, shut off the power switch. Turn on the power. Wait for about 5 minutes. Then turn off the power switch again. 4. Check the Drain Line Answer: Check the drain line to see if it is clogged. Turn off the power. Open the door to refrigerator. Look at the drain line. Is there water coming out of the drain line? If yes, turn on the power. Wait about 15 minutes. Then turn off power. Turn on the power again. Wait for about 5 to 10 minutes. Then turn off again.
How to Replace RCA Refrigerator Water Inlet Valve
1. Remove the screws from the back panel of the refrigerator. 2. Pull the back panel away from the front panel. 3. Disconnect the wires from the water inlet valve. 4. Unscrew the old water inlet valve. 5. Screw the new water inlet valve into place. 6. Connect the wires to the new water inlet valves. 7. Reattach the back panel to the refrigerator. 8. Turn on the power to the refrigerator. 9. Wait for about 20 minutes. 10. Turn off the power to the refrigerator and remove the back panel. 11. Clean the area around the water inlet valve with soap and warm water. 12. Dry the area thoroughly. 13. Apply a light coat of lubricant to the water inlet valve and tighten the screw. 14. Put the back panel back on the refrigerator. 15. Turn on the power and wait for about 20 minutes. 16. Turn off the power and remove the back panel again. 17. Clean the area around water inlet valve again. 18. Repeat steps 1 – 17 until all the screws are tight. 19. Turn on the power, wait for about 20 minutes, and turn off the power. 20. Turn on the power one last time. 21. Enjoy your new refrigerator!
How to Replace RCA Refrigerator Water Filter Housing
1. Remove the filter from the refrigerator. 2. Unscrew the screws holding the filter in place.
Click Here to Buy yours Now!
5. Drain pan – A drain pan is used to catch any liquid that drains from the meat during cooking. It is usually placed under the meat to catch drippings and juices.
How do you unclog a refrigerator defrost drain?
Refrigerators leak because of two reasons. One is the condensation that forms on the outside of the door. This happens because the cold air inside the fridge gets warmer as it travels towards the door. As the warm air comes into contact with the cooler surface of the door, it releases moisture. The other reason is that the compressor runs constantly even though the door is closed. It keeps running to maintain the temperature inside the fridge.
How do I stop my fridge from leaking freezer?
If you notice any clogs in your refrigerator drain tube, try using a plunger to remove it. This method works well if you notice the clog after the drain has been running for a while. However, if you notice the clogged drain right away, you can try using a snake to clear the drain. A snake is a long flexible metal rod used to clean drains. It is inserted into the drain pipe and pulled back and forth to dislodge debris from the drain. Make sure you follow the manufacturer’s instructions for how to properly install and maintain your appliance.
Why does water drip from freezer to refrigerator?
Water dripping from the freezer to the refrigerator is caused by air pockets in the ice cube trays. These air pockets get trapped between the tray and the sides of the freezer and eventually leak into the surrounding area. This is why you see water dripping from the freezer to refrigerator. To prevent this problem, you can freeze the ice cubes in a single layer instead of stacking them. Also, if you notice any leaks around the edges of the freezer, you can try using a silicone spray to fill the gaps.
How do you unclog a refrigerator drain tube?
If you notice any leaks around the door of your refrigerator, you should immediately call a professional repair service. Leaks can lead to mold growth and other problems if not addressed right away. A leaky door can also allow cold air into the interior of the refrigerator, causing damage to the insulation and potentially ruining the contents of the refrigerator. It is important to note that refrigerators are designed to hold a certain amount of moisture. If the humidity level gets too low, the compressor will run longer than normal to maintain the proper humidity levels. This extra load on the compressor could eventually wear down the motor and shorten the life of the appliance.
Why does my refrigerator drip water from the freezer?
If you notice any clogs in the drain line, try using a plunger to remove the blockage. This method works well if the clog is not very big. If the clog is larger, you can try using a snake or other tool to clear the drain line. If none of these methods work, you can call a plumber to help you.

It's knowing what you're doing and having a good basic foundation.
That's why my mission is to teach you the fundamentals of great cooking...
So you can start creating delicious dishes without any rules or restrictions whatsoever.
With my step-by-step instructions, my unique insider secrets and techniques,
You'll be able to easily take ordinary food and make it extraordinary!
- How to Prolong the Life of Your Kitchen Appliances - December 22, 2024
- How Long does Yogurt Take to Freeze - May 5, 2023
- Top 10 best restaurants in Montana - May 1, 2023