Last Updated on November 8, 2022
There are many ways to fix leaky refrigerators. One way is to change out the compressor or condenser coil. This repair should be done by a certified professional. Another way is to replace the evaporator fan motor assembly. This repair should be performed by a qualified technician.
If you notice water dripping down into the freezer compartment, it could mean that there is a damaged seal around the door gasket. You can replace the entire door gasket kit. However, we recommend replacing just the rubber part of the door gasket.
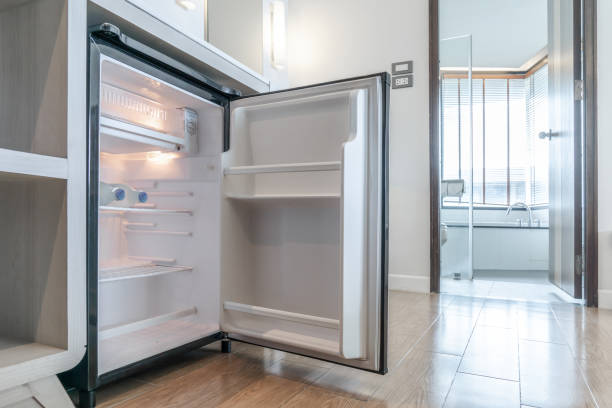
Viking Refrigerator Leaking Water – How To Fix
If you find yourself in a situation where your Viking refrigerator is leaking water, it’s important to understand what needs to happen next. If you don’t know how to fix the problem, you could end up causing even more damage.
Here are some steps to take if you discover leaks inside your fridge:
- Step 1: Make sure there isn’t something stuck in the drain. You might notice a small hole near the bottom of the unit. This is called the drain plug. Remove it and look for debris. If nothing is caught, try turning the faucet on and see if water starts flowing out. If it does, you probably just need to clean out the drain.
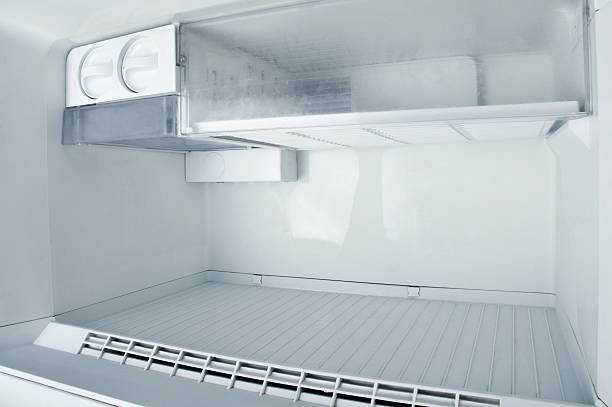
- Step 2: Look for cracks in the walls of the refrigerator. Cracks can allow moisture to seep into the interior of the appliance. You can use a flashlight to inspect the area, or simply open the doors. If you do spot a crack, make sure to tighten the screws holding the panels together.
- Step 3: Check the compressor. Your refrigerator uses electricity to keep food cold. When the power goes out, the compressor stops working. To test whether your compressor works properly, put one hand over the opening while pressing down on the handle. If no air escapes, the compressor is fine.
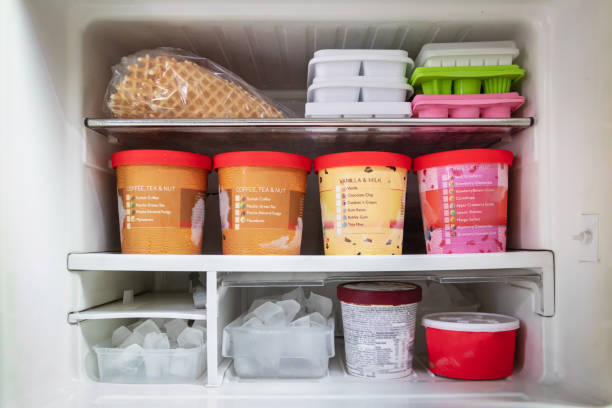
- Step 4: Open the freezer compartment. If you find that the ice maker is frozen solid, you’ll need to defrost it manually. Simply run hot tap water over the entire surface of the ice maker. Wait about 30 minutes and repeat the process again. Once the ice maker is free of frost, close the freezer compartment and let it cool completely.
- Step 5: Check the temperature settings. Most refrigerators come with three different temperatures: freezing, low, and high. These temperatures determine how quickly food spoils. For example, foods like milk and eggs spoil faster when stored at low temperatures.
How to Check the Level of Water in a Viking Refrigerator?
Viking refrigerators are one of the most popular brands among homeowners. However, repairing a broken fridge isn’t always easy. You’ll need some tools and knowledge to do it properly. Luckily, our experts can help you out.
We’ve been fixing refrigerators since 2013. All we ask is that you send us pictures of your old unit and include a description of what exactly happened. Then, we’ll give you a quote and schedule a convenient appointment.
Check the Water Line
To level the ice maker, it’s important to know where the water line goes. If there are no leaks, the water line should run from the bottom of the refrigerator to the outside wall. You don’t want to turn off the power while working on the unit because the compressor could stop running. When you open the door, make sure the water isn’t dripping onto the floor. If it is, fix the problem immediately.
The next step is to check the water line. Turn off the power and remove the ice tray. Then remove the cover panel on the back of the refrigerator. There should be a hole near the bottom of the fridge. Look inside the hole to see if the water line runs down the side of the refrigerator. If it does, replace the plastic tube. If the water line doesn’t run along the side of the refrigerator, look for another leak.
If there aren’t any leaks, put the ice tray back in the freezer and close the door. Now you can turn the power back on.
Viking Refrigerator Ice Maker Leaking – How to Fix
A leaky refrigerator ice maker is one of the most frustrating problems you can encounter, especially during the summer months. If you are having trouble finding the source of the problem, it could be because there is something wrong with the water supply lines. This article walks you through how to fix a leaking refrigerator ice maker.
1. Properly secure the Water Line
Check the water line connected to the ice maker for proper security before you replace it. This includes making sure there are no leaks or cracks. If you find one, fix it immediately. You don’t want mold growing inside your refrigerator.
Make sure the water line is tightly secured before you replace it. When you do install the replacement, make sure it is securely fastened to the wall. Don’t use tape or glue because those products could cause problems down the road.
If you need to replace the water line, call a professional plumber. They’ll know how to properly secure the connection.
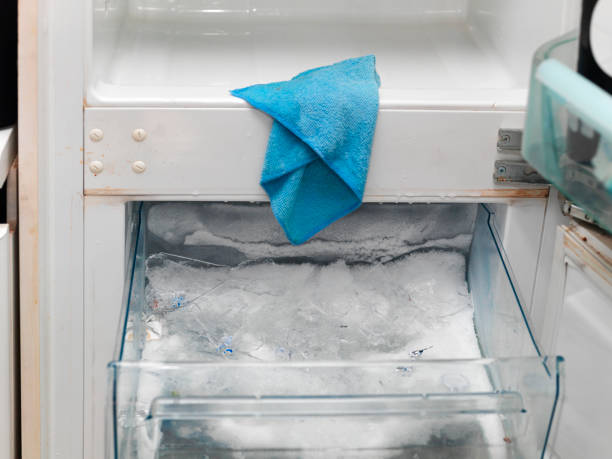
2. Unclog the Defrost
The defrost drain is located under the refrigerator door. You can unplug it by pulling out the plug at the bottom. If you are unable to locate the plug, you can call your local appliance repairman.
If the drain is clogged, pour hot water down the drain. This will melt the ice and help loosen the blockage. Then use a plunger to dislodge the blockage. Repeat this process several times over the course of a few hours.
You can also try pouring cold water into the drain. This will freeze the ice and break up the blockage. Once the blockage is broken up, pour warm water down the drain. Do this again several times over the course of a few hours.
How to Replace the Ice Maker?
Leaks are often caused by a malfunctioning water line or an incorrectly installed faucet. If you notice a leak, it’s best to call a plumber immediately. This will prevent further damage and help ensure that your home stays safe and dry during the repair process.
A leaking ice maker could cost anywhere from $300-$500. You can replace the whole thing with a newer model, but that might end up costing more in the long run. Instead, consider replacing just the part that leaks, such as the drip tray, the drain pan, or even the evaporator coil. This way you can easily fix the leak of the Viking Refrigerator.
Have you ever heard of Viking refrigerators leaking?
If yes, then you might want to read this article because it has some useful information about how to fix it.
The Viking refrigerator was released in the year 2000.
This model was designed to be energy efficient and cost effective.
The company claims that their new design makes them leak less water than other models.
The problem is that the water leaks from the bottom of the unit.
There are two ways to fix this issue.
First, you can replace the compressor or the condenser coil.
Second, you can repair the seal around the drain pan
Viking Refrigerator Leaking Water – What to Do
If you notice any leakages from your refrigerator, it is important to fix the problem immediately. This could lead to serious damage if not taken care of right away. Here are some tips to help you get rid of leaks from your fridge. 1. Check the seals around the doors and windows. Make sure that these are properly sealed. If you see any gaps, try tightening them using a screwdriver.
1. Unclog the Defrost Drain
You can unclog the drain by removing the ice tray and pouring hot water into the drain. It should start draining within 10 minutes. After that, pour cold water down the drain until the clogged material dissolves. 2. Clean the Drain Line Clean the drain line by running warm water down it. Use a brush or sponge to clean the area where the drain meets the sink.
2. Check the Drain Pan
If the drain pan is not working properly, check if the drain pipe is clogged. This could happen if the drain pipe is blocked by hair or other debris. To fix this problem, remove the drain pan from the sink and run hot water down the drain pipe. Let the water flow for about 30 seconds, then turn off the faucet and let the water drain away. Repeat this step several times until the blockage clears. 3. Remove Clogs To remove clogs, you can use a plunger or a snake. A plunger works well when the drain is plugged with solid materials such as soap scum, grease, or hardened fats. A snake works better when the drain is clogged with liquid.
3. Check the Door Seal
Check the door seal to ensure that it is not leaking. If the seal is damaged, replace it immediately. 4. Clean the Drain Pipes Clean the drain pipes using a brush and warm water. Make sure that the drain pipes are clean before installing the new drain pan.
How to Replace Viking Refrigerator Door Seal
1. Remove the old door seal from the refrigerator door. 2. Install the new door seal into the refrigerator door.
5. Replace the Water Filter Housing
6. Clean the filter screen 7. Clean the heating element
How to Replace Viking Refrigerator Water Filter Housing
1 Remove the refrigerator door from the hinge side. 2 Unscrew the screws holding the top panel to the back wall. 3 Lift the top panel off the back wall. 4 Remove the old filter housing. 5 Install the new filter housing. 6 Screw the top panel back into place. 7 Reinstall the door hinges.
6. Check the Water Inlet Valve
Check the water inlet valve to ensure it is not leaking. This could result in the unit being damaged if water enters the unit. 7. Clean the Unit Answer: Clean the unit using warm soapy water. Make sure to clean the coils and fan blades.
Click Here to Buy Yours Now!
To clean the unit, remove the top cover and wash the unit thoroughly with warm soapy water. Wipe down the outside of the unit with a dry cloth. Remove any residue from the bottom of the unit. Replace the top cover. 8. Check the Drainage System Answer: To check the drainage system, turn off the power switch and wait 30 minutes. Then drain the hot water into a sink. Turn the power back on. Wait another 30 minutes. If the water drains slowly, replace the filter.
How to Replace Viking Refrigerator Water Inlet Valve
1 Open the refrigerator door. 2 Pull the water line out of the wall.
Viking Refrigerator Water Dispenser Leaking – Quick Fix
Step 1: Remove the water line from the wall. Step 2: Remove the old water line from the wall using a screwdriver. Step 3: Install new water line into the wall. Step 4: Close the refrigerator door.
1. Flush the Water System
To flush the water system, turn off the cold water supply valve located near the bottom of the refrigerator. Open the drain valve located on the back side of the refrigerator. Turn on the hot water tap located on the front panel of the refrigerator. Wait until the water runs clear. 2. Replace the Drain Valve Answer: To replace the drain valve, remove the two screws holding the drain valve in place. Slide the drain valve out of the hole. Clean the drain valve and install it in the same hole. Reinstall the two screws.
2. Level the Refrigerator
To level the refrigerator, follow these steps: Remove the three Phillips screws from the rear of the refrigerator. Lift the top shelf away from the cabinet. Place a flat object such as a piece of cardboard under the lower shelf. Lower the shelf into position. Tighten the three Phillips screws. 3. Check the Door Seal Answer: To check the door seal, open the refrigerator door slightly. If liquid leaks around the edges of the door, the door seal needs to be replaced.
How to Level Viking Refrigerator
1 Unplug the refrigerator. 2 Open the back panel of the refrigerator.
3. Check the Water Line
To level the ice maker, remove the ice tray from the freezer drawer. Remove any ice cubes that are stuck to the tray. Then place the tray back into the freezer drawer. 4. Check the Ice Maker Motor 5. Check the Ice Tray
Viking Refrigerator Ice Maker Leaking – How to Fix
If you notice a leak around the door hinge area, you can try tightening the screws holding the door together. This usually works well if the leak is coming from the bottom of the door. If the leak is coming from above the hinges, you may need to replace the rubber gasket around the door frame. 6. Clean the Door Hinge Area 7. Replace the Rubber Gasket Around the Door Frame
2. Unclog the Defrost drain
1. Properly secure the water line 2. Unclogged the defrost drain
How to Replace the Ice Maker of a Viking Refrigerator
Ice makers are built into refrigerators to provide ice cubes for drinking water and making drinks. In addition, they help maintain the refrigerator’s interior temperature by creating cold air. Ice makers generally operate using electricity, but some models also use gas or propane. To replace the ice maker, remove the back panel of the freezer compartment. Remove the plastic drawer liner from the bottom of the freezer compartment. Then, remove the two screws holding the ice maker assembly in place. Lift the ice maker assembly out of the freezer compartment. Disconnect the wires connecting the ice maker to the power source. Remove the old ice maker and install the new one. Reattach the wires and secure the ice maker in place. Put the plastic liner back in the freezer compartment and reinstall the back panel.
How do you replace a Viking refrigerator water valve?
A water solenoid valve is a part of the plumbing system that controls the flow of water into the faucet. It consists of a coil of wire wound around a core. A magnet is placed near the coil and when electricity passes through the coil, it creates a magnetic field that pulls the magnet towards it. This movement opens or closes the valve depending on whether the magnet is pulled away from or pushed towards the coil. In order to replace a water soleniod valve, you will need to remove the old valve and install a new one.
How do you remove a solenoid valve?
Solenoids are used in many different applications. A solenoid valve is a type of electromagnetically operated valve. It consists of two coils of wire wound around a bobbin. One coil is connected to the power supply usually alternating current and the other is connected to the armature. When the power supply is turned off, the magnetic field collapses and the armature moves away from the pole piece, thus opening the valve. When the power supply turns back on, the magnetic field expands and pulls the armature towards the pole piece, closing the valve.
How do you replace a water solenoid valve?
Viking refrigerators have a built-in water valve that allows you to fill the ice maker and water dispenser. This valve is located near the back of the refrigerator door. It is usually found on the right side of the door. To remove the old valve, unscrew the three screws holding it in place. Then pull off the valve assembly. Be sure to save the new part for future replacement.

It's knowing what you're doing and having a good basic foundation.
That's why my mission is to teach you the fundamentals of great cooking...
So you can start creating delicious dishes without any rules or restrictions whatsoever.
With my step-by-step instructions, my unique insider secrets and techniques,
You'll be able to easily take ordinary food and make it extraordinary!
- How to Prolong the Life of Your Kitchen Appliances - December 22, 2024
- How Long does Yogurt Take to Freeze - May 5, 2023
- Top 10 best restaurants in Montana - May 1, 2023