Last Updated on November 8, 2022
The most important thing to remember about breadmaking is its process. You don’t just throw some ingredients together and wait for the magic to happen; you must knead the dough properly. This is where the real work happens. If you want light, airy loaves, you’ll need to pay attention to every detail.
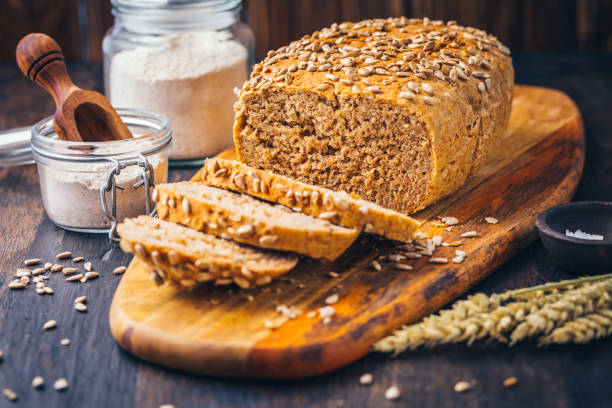
To make perfect bread, you will need to know how much yeast to use, what temperature to bake it at, and how long to let it rise. We’ve got all the information you could ever need to master the art of breadmaking.
Mistakes You Must Avoid While Baking Bread
Not Spending Enough Time On Kneading Yeast Dough
The most important part of making bread is the yeast dough. A lot goes into it, including ingredients like flour, water, salt, sugar, eggs, milk, butter, oil, and sometimes even honey. But one thing you don’t want to do is overwork the dough. If you do, you’ll have a tough, chewy crust and a soggy inside.
Kneading is the process of incorporating air into the dough. This helps the gluten develop and gives the dough elasticity. When you’re done kneading, the dough should look smooth and shiny.
There are different ways to knead. Some people prefer a machine called a “stand mixer.” Others use their hands. Either way, there is an optimal amount of kneading time.
For starters, you shouldn’t work the dough too long. At least 10 minutes, but no longer than 15. After that, the dough becomes sticky and difficult to handle.
You can also add more flour during the kneading process. Just make sure you don’t go overboard. Too much flour will cause the dough to become heavy and dense, resulting in a flat, hard crust.
If you’re working with a stand mixer, you can increase the speed slightly while kneading. You usually start out slow for hand mixing and gradually build up speed.
Once you’ve finished kneading, put the dough in a lightly greased bowl. Cover with plastic wrap and set aside somewhere warm for about 30 minutes. During this time, the yeast will begin to rise. Once it does, you can shape the dough into loaves or rolls.
Don’t Mix Salt and Yeast Together
Salt is excellent for bread baking, but it can kill off the yeast if used too early. To avoid this problem, never add salt to the flour mixture before adding the yeast. This will ensure that the yeast has plenty of sugar to feed on and grow properly. If you do accidentally mix salt with the yeast, just toss out the batch of dough. You’ll find that the next one will work fine without any problems.
Patience In The Final Stages Of Molding The Bread
If you’re trying to make bread in the microwave, don’t do it. You’ll end up with something that looks like a piece of cardboard. If you want to make bread in the oven, follow these steps:
- Preheat the oven to 350 degrees Fahrenheit.
- Grease a loaf pan.
- Combine the flour, salt, sugar, yeast, and water in a large bowl. Mix well.
- Add the olive oil to the dough and mix well. Add the milk and eggs and mix again.
- Cover the bowl with plastic wrap and let rise for 30 minutes.
- After rising, add the butter to the dough and knead thoroughly.
Is The Solution?
The problem with baking bread is that it takes a lot of work. There are many steps involved in making bread, including kneading, proving, shaping, proofing, baking, cooling, and storing. If you don’t follow every step correctly, you’ll end up with a soggy mess. But there is one key ingredient missing from most recipes: salt. Salt helps bread rise and keeps it moist during storage. In fact, without salt, bread doesn’t even taste good. So what is the solution?
1. Gluten Can Help
Gluten is a protein in wheat flour that gives baked goods structure and chewiness. When it comes to bread, adding gluten increases the density of the bread. This makes it easier to roll out and shape into a loaf. And because bread is usually sliced horizontally, having a dense crust allows the interior to remain soft and chewy.
To make sure you don’t end up with soggy bread, use the following guidelines:
• For whole grain bread, add about ½ cup of gluten per 2 cups of flour.
• For white bread, add about ¼ cup of gluten per 4 cups of flour.
What type of gluten do I need? To determine how much gluten you need, look at the ingredient label on the back of the box. If there are words like “wheat,” “rye,” “spelled,” or “Kamut” listed among the ingredients, you’ll want to add a little less gluten. But if the word “gluten” appears alone, you’re good to go.
How do I know if my recipe needs additional gluten? There are several ways to test whether your dough needs extra gluten. One easy way is to knead the dough for 10 minutes simply. If it feels too sticky, add a little more flour; if it starts to feel dry, add some water. Another way is to divide the dough into three equal parts and let each part sit for 15 minutes. Then take one piece of dough and stretch it out slowly while rotating it 90 degrees. If the dough stretches easily without breaking apart, it needs more gluten.
2. Warm or Room Temperature Water For Yeast Will Make It Work For You
When making bread, you know how important it is to use warm water. But what does that mean exactly? Well, there are many ways to ensure your water is hot enough. Some people like to boil the water, and others prefer to put it into a microwave oven.
If you do not want to go through the trouble, you can always just wait for the water to come up to the temperature naturally. This is why we recommend waiting about 10 minutes before adding your yeast. Once you add the yeast, the mixture will start to foam. This is because the yeast needs some heat to work properly. So, once you see this happening, you can safely say that your water is ready.
3. The Windowpane Test – a Technique Every Beginner Baker Should Know
The windowpane test is a simple way to see whether your dough has been properly mixed. If it doesn’t pass the windowpane test, it needs additional mixing. To perform the windowpane test, simply pull off a small piece of dough and roll it into a ball. Then flatten the dough out slightly and place it between two sheets of parchment paper. Roll the dough over the edge of the table and press down firmly. You want to ensure that there are no air pockets inside the dough. If there are air pockets, the dough will collapse during baking.
4. Measuring Cups
Measuring cups are not accurate. There is too much room for error. They do not account for temperature changes and humidity. Use a scale to measure flour, sugar, oil, etc. You cannot put a cup of water into a cup of flour because it won’t mix properly. Using a scale ensures accuracy.
Baking requires precise measurements. A scale is essential for baking recipes. Scales are used to weigh ingredients like flour, sugar, and salt. In addition to weighing ingredients, scales help determine how many eggs you need, how much butter or shortening you need, and how much liquid you need. Measuring cups are not intended for baking. Instead, they are designed to measure liquids such as milk, juice, and water. When measuring dry ingredients, use a spoon.
Now that you know everything about baking bread and making it worth the effort, share your bread experience in the comment section below.
Do you ever wonder why bread seems to get heavier and denser after sitting out for awhile?
There’s a reason for this!
If you’ve been baking bread at home, then you know that bread dough gets heavy and dense after sitting out for awhile.
This happens because yeast cells multiply and create carbon dioxide gas inside the dough.
When the dough sits, the carbon dioxide builds up and causes the dough to expand.
In this article I’m going to explain you how to prevent this problem.
Why Is My Bread So Dense & Heavy?
Bread dough contains gluten, a protein found in wheat flour. Gluten helps bread dough hold together during baking. But if you have been making bread from scratch for years, chances are you’ve noticed that your loaves tend to get dense and heavy after a while. This happens because the gluten proteins begin to break down over time. As the gluten breaks down, the bread loses its elasticity and becomes heavier. To help prevent this problem, store your homemade bread in airtight containers. Also, try using a bread maker instead of kneading the dough by hand. It’s easier and faster, plus you’ll end up with a lighter loaf.
These Can Affect How Dense Your Bread Is
If you’re having problems with your bread being dense and heavy, here are some factors that could be affecting how dense your bread is. 1. Too Much Water – Adding too much water to the dough can cause the bread to become dense and heavy. Try adding 1/2 cup of warm water to every 2 cups of flour. 2. Overmixing – Mixing the dough too long can cause the gluten proteins to break down. A good rule of thumb is to mix only until the ingredients form a shaggy mass.
Yeast Activity
Yeast activity is measured using a hydrometer. This is a tool used to measure the specific gravity of liquids. Specific gravity measures the density of a liquid compared to pure water. A hydrometer consists of two parts; a graduated cylinder or glass tube and a weighted float. The float is placed into the liquid being tested and the hydrometer is inverted until the float touches the bottom of the cylinder. Then the float is raised until it reaches the top of the cylinder. The reading is taken from the scale located on the side of the cylinder. The higher the reading, the greater the specific gravity.
Gluten Formation
Gluten formation occurs when gluten proteins form bonds with other substances such as starch. Gluten is found in wheat flour, barley, rye, oats, spelt, kamut, triticale, durum, semolina, farina, malt, and malt extract. Gluten is responsible for giving dough elasticity and extensibility. It is also important in determining bread’s texture and flavor. Gluten is formed during the baking process. During kneading, enzymes break down the starches in the flour into sugars. These sugars react with the amino acids in the protein fraction of the flour to form peptide linkages. As these peptides bond together, they become long chains called polymers. The longer the chain, the stronger the gluten network becomes. Once the gluten forms, it cannot be broken down again.
The Poke Test:
To test for gluten formation, poke a hole in a piece of dough. If the hole closes back up, no gluten was present. If the hole remains open, gluten was present.
The Windowpane Test:
To test for gluten formation, place a piece of dough between two sheets of parchment paper. Roll the dough into a circle about 1/4 inch thick. Remove the top sheet of parchment paper. Place another sheet of parchment paper on top of the dough. Using a ruler, cut the dough into strips 2 inches wide. Cut each strip into 4 pieces. Roll each piece into a ball. Set aside. Repeat steps 3 and 4 until all the dough has been tested. If the window pane test explains no gluten, then the bread is safe to eat. If the window pane test explains gluten, then the bread needs to be cooked again.
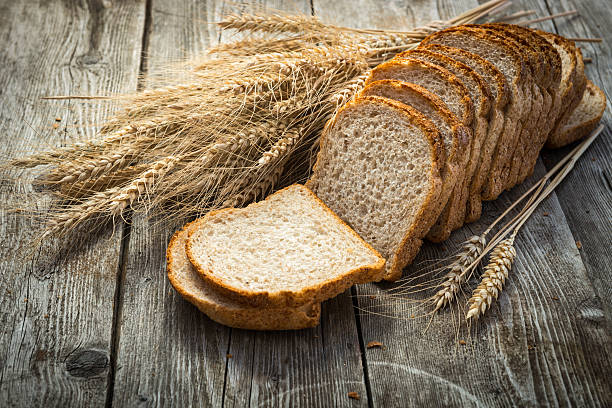
The Type Of Flour You Use
Flours vary in protein content and texture. Protein content refers to how much protein is present in the flour. Gluten is a protein found in wheat, barley, rye, and oats. It gives breads and pastas elasticity and helps hold air pockets during baking. Gluten is what allows bread to rise. To determine if a flour contains gluten, you can perform the windowpane test. Simply roll out a piece of dough between 2 layers of parchment paper. Then remove the top layer of parchment paper. Now place another piece of parchment paper on top. Using a ruler, measure the width of the dough. Divide the length of the dough by the width to get the ratio. This is the gluten percentage. A higher gluten percentage indicates a stronger gluten presence in the flour.
Lack Of Water / Too Much Flour
If you are using too much flour, the dough will not rise properly. In order to prevent this from happening, you need to add enough liquid to the dough. For example, if you are making pizza dough, you can add 1 cup of warm water to 3 cups of flour. Mix well until a soft ball forms. Let rest for 10 minutes. After resting, knead the dough again. Add additional water if needed.
Shaping Of The Dough
To shape the dough into balls, roll the dough out onto a floured surface. Roll the dough out to about ¼ inch thick. Using a cookie cutter, cut out circles. Place the dough rounds on a baking sheet lined with parchment paper. Cover with plastic wrap and let rise for 30 minutes. Preheat oven to 450 degrees F. Bake the pizzas for 5 to 7 minutes per side. Pizza Sauce
The Baking Time
Bake the pizza sauce for 10 to 15 minutes.
Temperature
Bake the pizza sauce at 400 degrees Fahrenheit for 10 to 15 minutes Cooking Method
Using Volume Instead Of Weight
To calculate the volume of a liquid, multiply its height in inches by its width in inches by 0.45. For example, if you pour a cup of coffee into a measuring cup, the volume equals 1 cup. To measure the weight of a liquid, simply divide the volume by the density of the liquid. For example, if the density of water is 1000 grams per liter, then 1 cup of water weighs 100 grams.
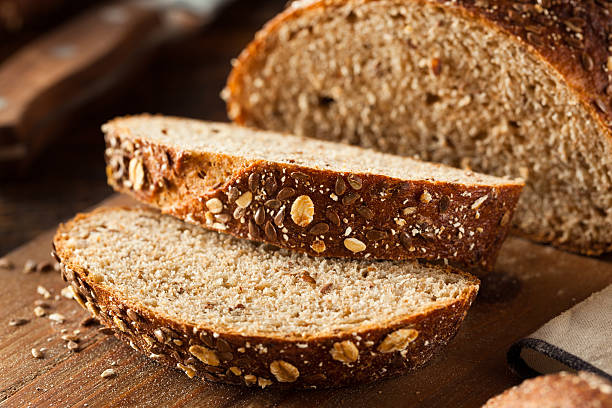
Why Is My Bread So Chewy?
Bread is usually chewy because it contains gluten. Gluten is a protein found in wheat flour and other types of grain products. It gives bread dough its elasticity and chewiness. But not all breads contain gluten. Many breads are made from flours that don’t contain any gluten. These breads tend to be softer and moister than breads made with wheat flour.
Making Your Bread Less Chewy
If you’re looking for a soft, moist loaf of bread, try using a combination of whole wheat flour and white flour. Whole wheat flour adds flavor and texture while white flour provides structure.
To get rid of the chewy quality in your bread, mix equal parts whole wheat flour and white bread flour. This recipe works well for sandwich loaves, baguettes, rolls, and dinner rolls. You can also reduce the chewiness of your bread by adding baking soda or baking powder.
Baking soda is used to leaven baked goods such as cookies and muffins. Baking powder is used to leaven quick breads like pancakes and waffles. Both baking soda and baking powder help give bread a lighter texture.
Another way to make your bread less chewy is to let it cool completely before slicing. Letting the bread cool helps prevent the formation of pockets of warm air between slices. Warm air pockets can trap moisture and cause the bread to become soggy.
Use A Different Flour
To make your bread softer, add a different type of flour to your dough. For instance, if you normally bake with all-purpose flour, try making your next batch with whole wheat flour instead. Whole wheat flour contains more protein than regular all-purpose flour. Protein gives bread structure and keeps it from becoming flat when cooked. Bread made with whole wheat flour tends to be slightly denser than bread made with all-purpose flour. However, the density difference isn’t noticeable unless you slice into the bread. Add More Water
Implement Some Different Ingredients
If you’re looking for a healthier alternative to store bought bread, you can easily make your own. To make homemade bread, combine two cups of warm water with 1/2 cup of yeast and 2 tablespoons of sugar. Let the mixture sit until it becomes frothy, about 10 minutes. Add 3 cups of flour and mix well. Cover the bowl with plastic wrap and let the mixture rest for 30 minutes. After resting, knead the dough for 5 minutes. Place the dough in a greased bowl and let rise until doubled in size, about 45 minutes. Punch down the dough and shape it into loaves. Bake the loaves in a preheated oven at 350 degrees Fahrenheit for 25 minutes.
Carry on Baking
To bake bread, you’ll need a loaf pan, a baking sheet, a measuring cup, a mixing spoon, a knife, a cutting board, a wooden spoon, a timer, a thermometer, and a baking stone. First, cut off the crusts from the bread. Then, cut the bread into slices. Put the slices in a loaf pan. Pour enough hot water into the pan to reach halfway up the sides of the bread. Bake the bread for 20 to 25 minutes, or until golden brown. Remove the bread from the oven. Turn the bread over onto a cooling rack. Cool completely. Cut the bread into cubes.
Why is my bread so heavy?
Fluffy bread is made from flour and water. Flour contains gluten, a protein found in wheat. Gluten gives bread elasticity, making it stretchy and light. Water helps bind the dough together, giving bread its characteristic texture.
What can I do if my bread is too dense?
Heavy bread is usually characterized by a dense crumb structure and a moist center. Heavy breads tend to be dense because they have been enriched with butter, eggs, milk, cream, or other fats. Breads containing these ingredients are typically heavier than those that are not.
How do you make heavy dense bread?
To avoid bread becoming heavy and dense, try adding baking powder and baking soda to the dough. These ingredients help to lighten the texture and give the bread a fluffy consistency. Baking powder and baking soda react with the moisture in the dough to form carbon dioxide gas, which helps to lighten the loaf. This process is called leavening. To ensure that the bread doesn’t become heavy and dense, mix the dry ingredients together well before adding the liquid. Also, if you knead the dough for long periods of time, the gluten proteins in the dough will develop and strengthen. This will result in a denser loaf.
What is heavy bread?
Gluten free breads are made from different types of flours such as corn starch, potato starch, tapioca starch, millet flour, sorghum flour, buckwheat flour, quinoa flour, amaranth flour, teff flour, oat flour, almond flour, coconut flour, soy flour, rice flour, arrowroot flour, cassava flour, millet flour, and others. Gluten free breads are not only lighter but also tastier than regular breads.
What makes bread soft and fluffy?
White bread is usually made from refined flour, while whole wheat bread is made from unrefined flour. To make bread dense, you need to add sugar to the dough. This helps the yeast to activate quickly and give the bread a sweet flavor. It also helps the dough to rise better. Add about 1/4 cup of granulated sugar to the dry ingredients flour, salt, and yeast. Mix well. Make sure the sugar is dissolved completely and add the milk and butter and combine well. Cover the bowl and let stand for 20 minutes. After the 20 minutes, add the egg and beat well. Add additional sugar if needed. Cover with plastic wrap. Let rest for another 20 minutes. Then punch down the dough and divide into two equal parts. Shape each half into a round ball. Place the balls back together and roll out the flattened dough using the rolling pin. Cut the dough into pieces and place on a greased baking sheet. Bake at 400°F for 25–30 minutes. What is gluten free bread?
How do you make bread dense?
To make heavy dense bread, you need to add a bit of sugar to the dough. Sugar helps the yeast to activate faster and gives the bread a sweet taste. It also helps the bread to rise better. Add 1/4 cup of sugar to the dry ingredients flour, salt, and yeast. Mix well. Make sure that the sugar is dissolved completely. Add the milk and butter and mix well. Cover the bowl with plastic wrap and set aside for 20 minutes. After 20 minutes, add the eggs and beat well. Add the remaining 1/2 cup of sugar and mix well. Cover with plastic wrap and let rise for another 20 minutes. Punch down the dough and divide it into 2 equal parts. Shape each part into a round ball. Put the balls back together and flatten them slightly. Roll out the flattened dough using a rolling pin. Cut the rolled dough into pieces and place them on a greased cookie sheet. Bake for 25–30 minutes at 400°F. What is the difference between white and whole wheat bread?
How can we prevent bread from becoming heavy and dense?
If your bread is too dense, it could mean that the yeast hasn’t been activated properly. This is usually caused by not allowing enough time between mixing the dough and baking. Breads that are mixed too soon tend to be dense because the gluten strands haven’t had time to develop.
To avoid this problem, mix the dough only after the flour has been added and let it rest for about 10 minutes.
Then, knead the dough until it becomes smooth and elastic. After that, put the dough into a lightly greased bowl and cover it with plastic wrap. Let it sit overnight. In the morning, remove the plastic wrap and let the dough rise again. Once the dough has risen, punch down the dough and shape it into loaves. Place the loaves in a greased loaf pan and bake them for 30–40 minutes at 350°F.
In summary, bread is a very popular food, with about 1 in 3 American households purchasing bread on any given day. Bread is usually not eaten alone, but used as an accompaniment to other foods, such as sandwiches or soup.

It's knowing what you're doing and having a good basic foundation.
That's why my mission is to teach you the fundamentals of great cooking...
So you can start creating delicious dishes without any rules or restrictions whatsoever.
With my step-by-step instructions, my unique insider secrets and techniques,
You'll be able to easily take ordinary food and make it extraordinary!
- How to Prolong the Life of Your Kitchen Appliances - December 22, 2024
- How Long does Yogurt Take to Freeze - May 5, 2023
- Top 10 best restaurants in Montana - May 1, 2023